
V10 | Creating Mirrors in KD Max
Looking to create a mirror for your bathroom or kitchen in KD Max?
Follow these simple steps to create your own mirrors for your KD Max drawings.
1.
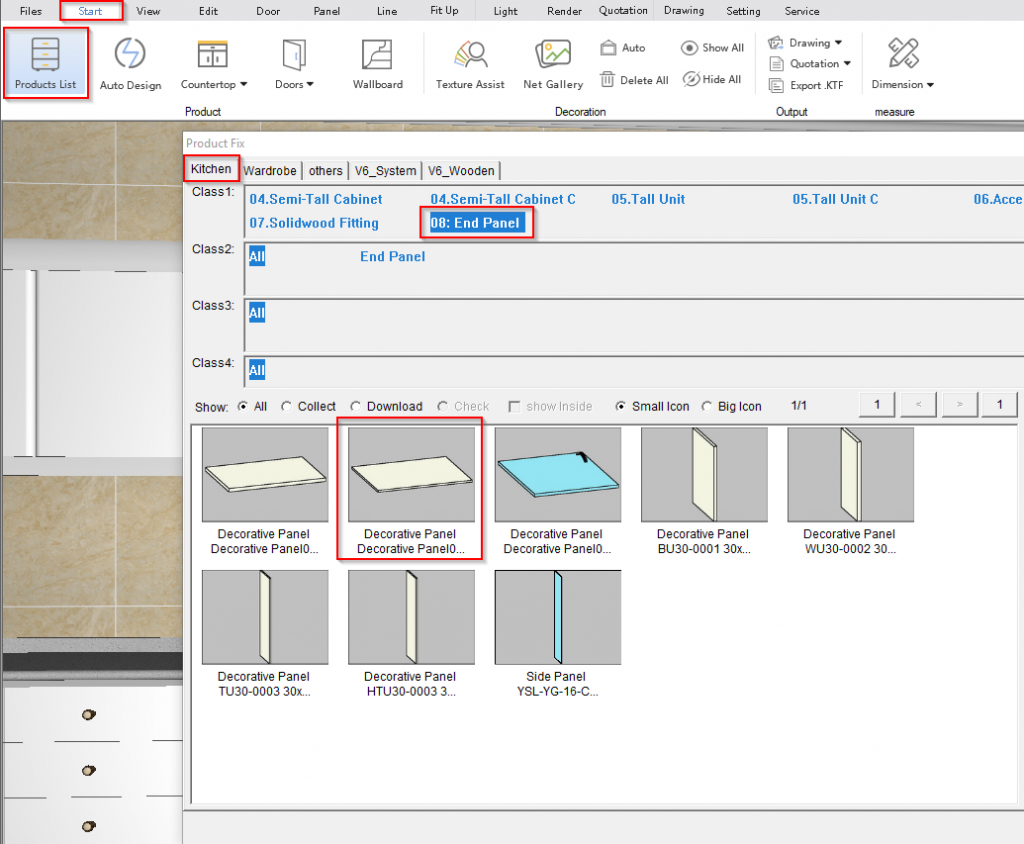
To get the desired result, first start by adding a Decorative Panel, which can be found by navigating through Start > Products List > Kitchen > 08: End Panel. In this tutorial, we’ll be using this panel to act as a mirrored splashback.
2.
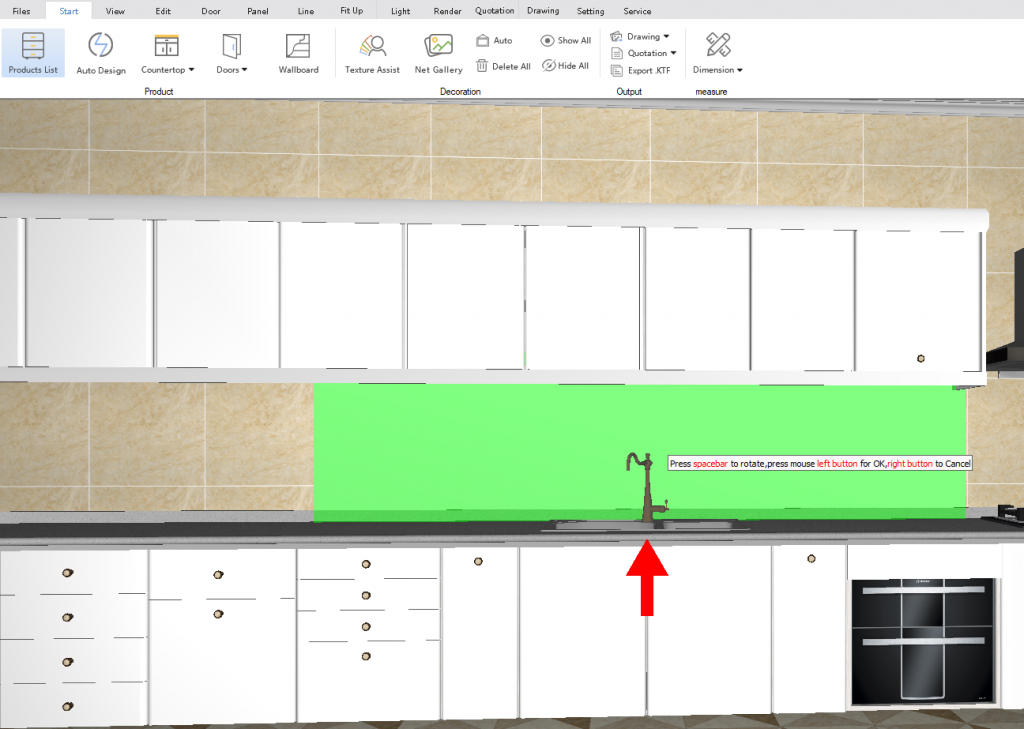
Once a Decorative Panel has been selected, click OK. Then enter the dimensions of the splashback. For the Width field, enter the length of the panel. In this case, 3000 has been entered. The Depth refers to the height of the material. 500 has been entered in this case.
Now the Height refers to the thickness of the material. 10 has been entered for this example. Once the measurements are OK click Layout and place the panel in the drawing.
3.
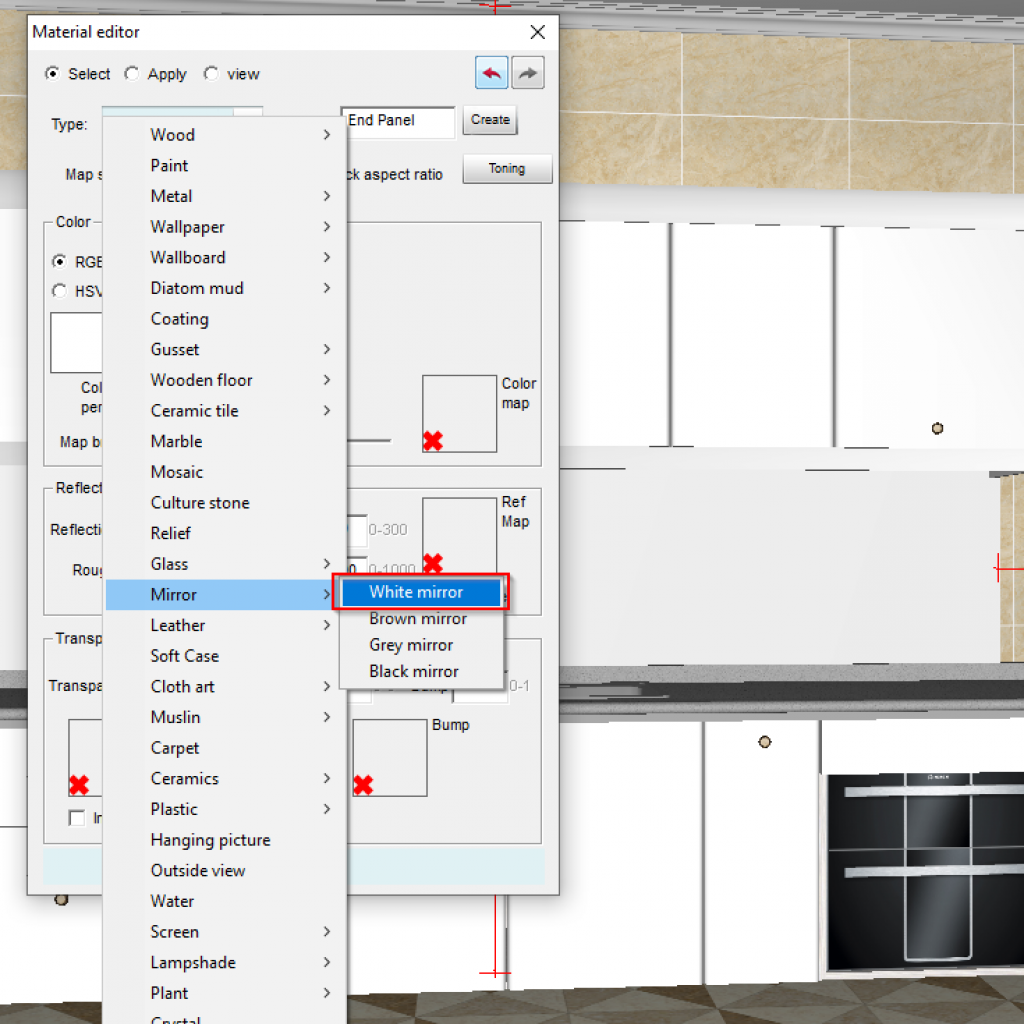
Next, navigate to Edit > Material Editor. This will allow changes to be made to the material such as reflection and transparency.
Select the decorative panel in the drawing. In the window pop-up, click the little X on the colour map to remove any properties that the panel may have. Next, set the RGB colours to 255 on Red, Green and Blue which will make the colour white. As this will become a mirrored panel, set the Type to Mirror > White Mirror.
4.
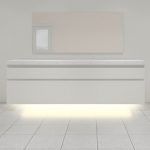
The panel will now successfully take on the properties of a mirror. Render the design in order to see the effect.

Join in the conversation on our 3D Kitchen Design Australia – KD Max Facebook Group.
Do you have any handy tips that you use in KD Max? Send them through to info@cabinetsbycomputer.com and we will feature them on our website & Facebook page!


