
V10 | Adding a Breakfast Bar and Waterfall to An Island Bench
Adding a breakfast bar and waterfall to your benchtop is easy!
Here we go through the steps necessary to install a breakfast bar and waterfall design to your benchtop in KD Max.
1.
Firstly, install a worktop by hitting the AutoInstall Worktop button. Then right-click on your benchtop and click the Edit button.
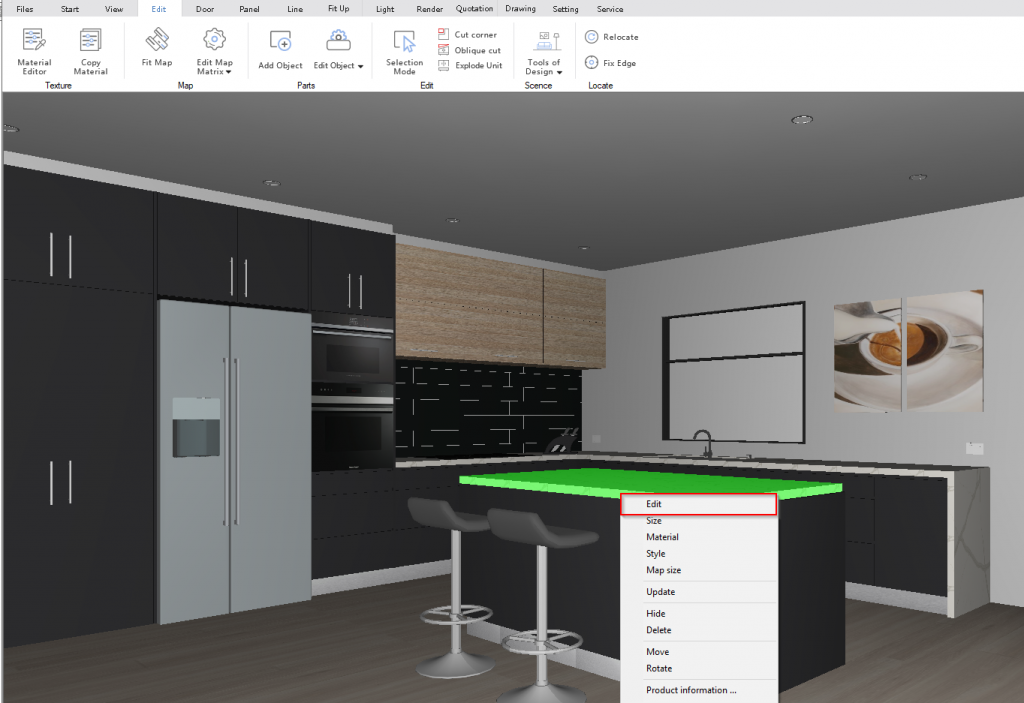
2.
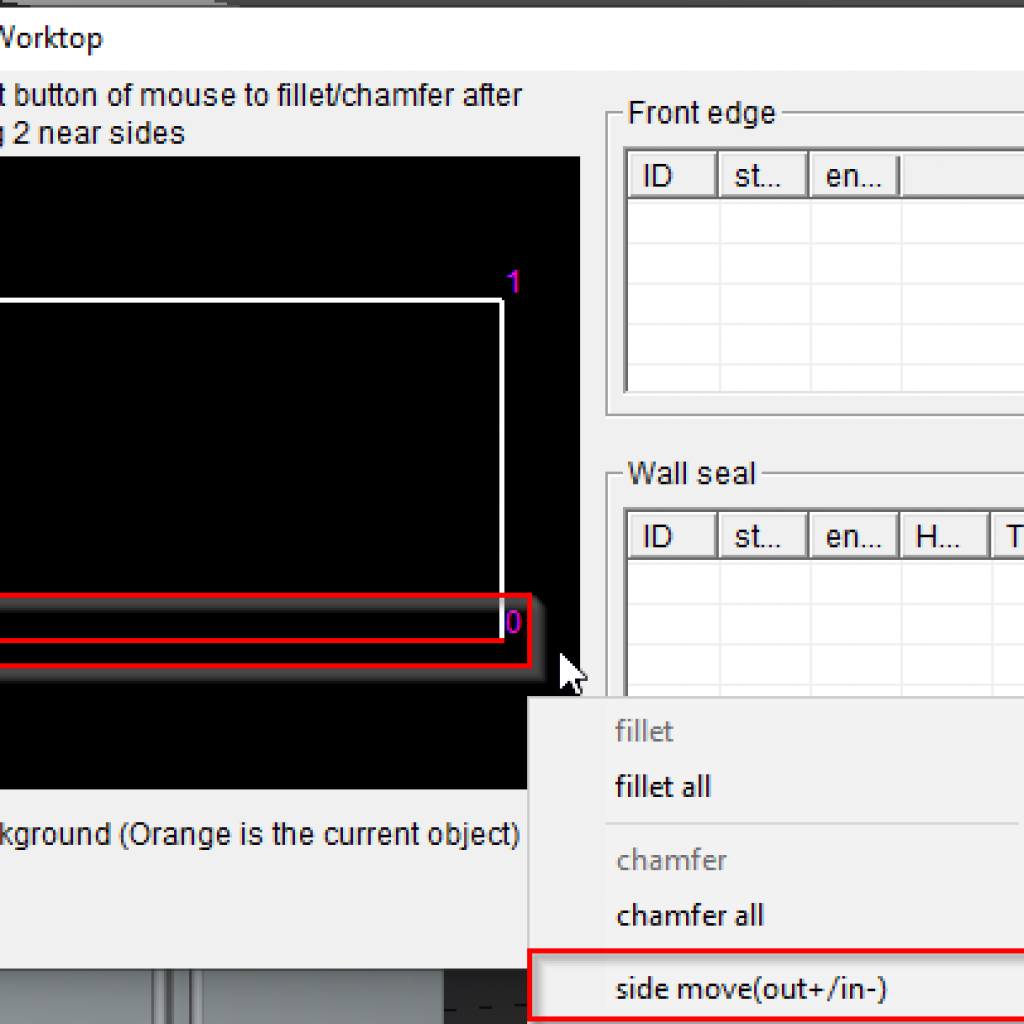
Next, left-click on the edge of the benchtop that is going to be extended. This will then turn the edge red. Right-Click to bring up the menu and select Slide / Move (out+/in-).
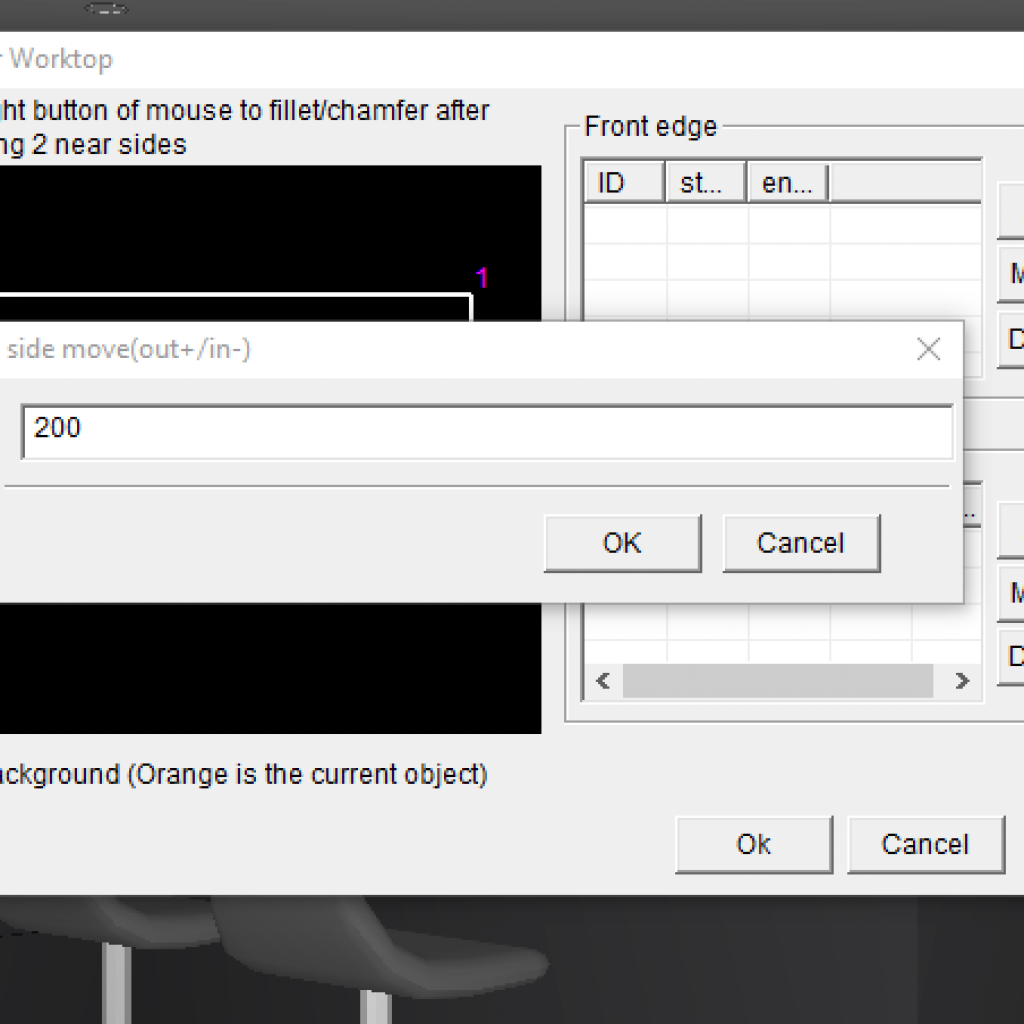
3.
Enter in the amount desired to extend the edge out. E.g. 200 would move the edge 200mm. Once a selection is made, click OK.
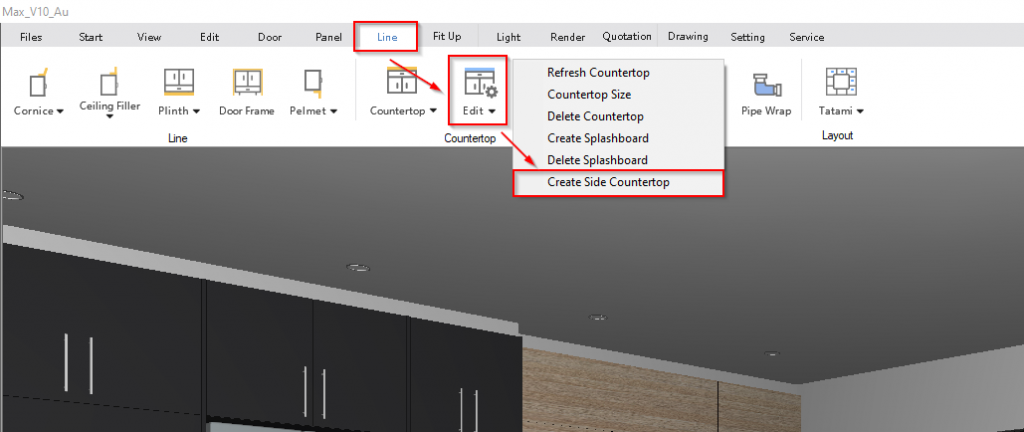
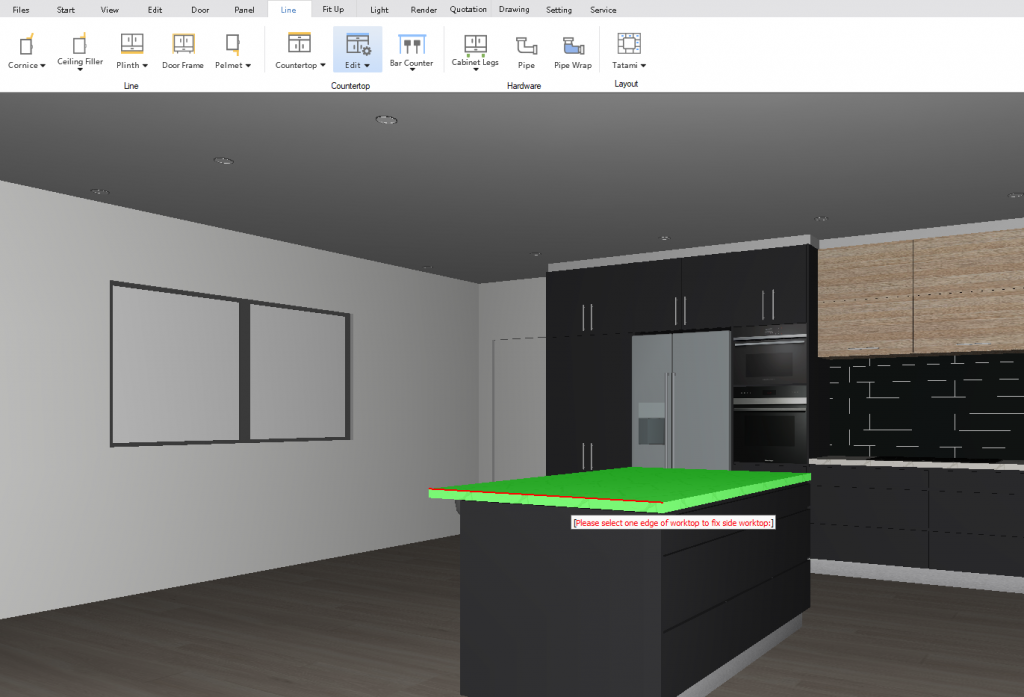
4.
Now navigate to Line > Edit > Create Side Countertop using the toolbar at the top of the screen.
5.
Select the edge of the benchtop that will be turned into a waterfall, this will highlight the edge in red. Left-click again to confirm.
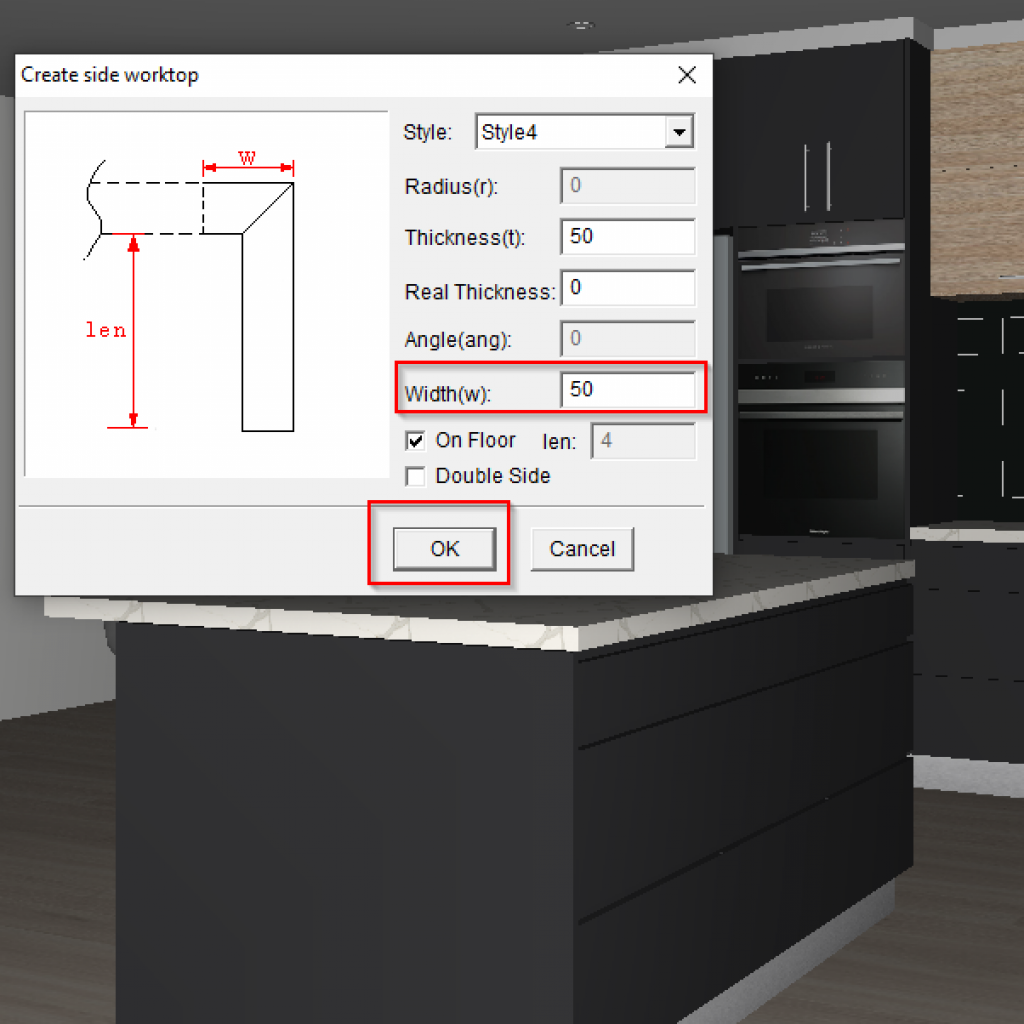
6.
Enter in specifications. The Width(w) is the distance from the end of your existing benchtop. To make the waterfall side fall straight beside the cabinets, set the Width(w) to equal the benchtop thickness, minus the overhang you have determined in your Global Settings. Simply click OK to continue.
7.
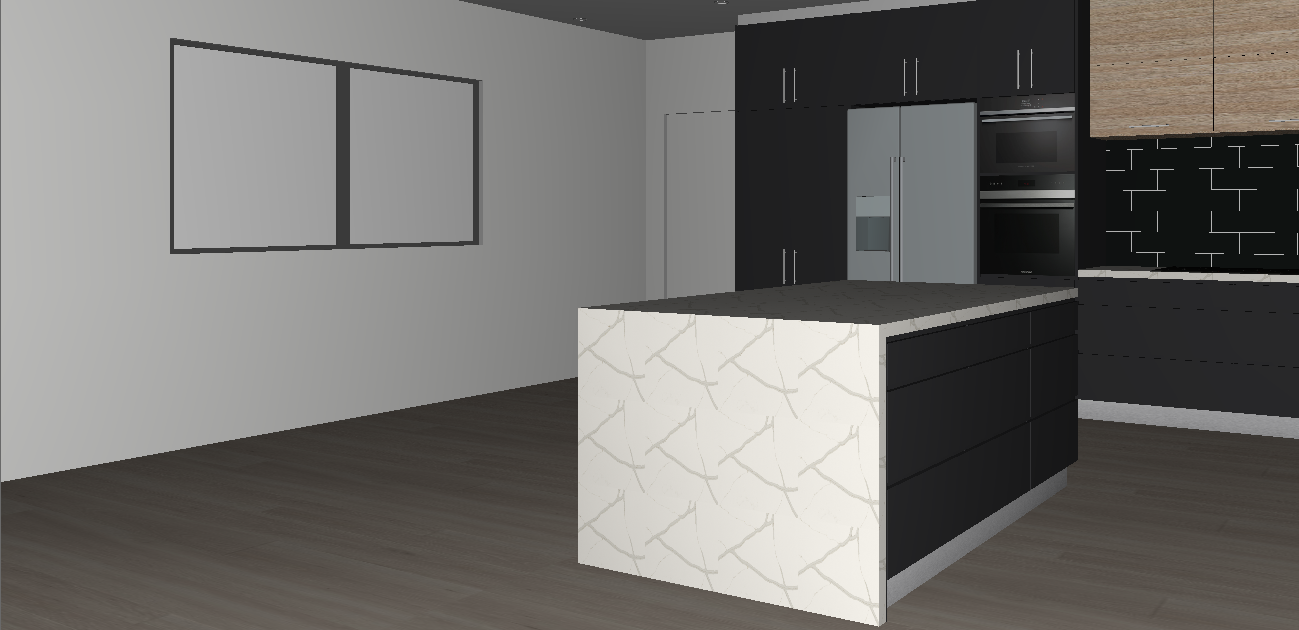
Ta-da! Congratulations, you have now successfully created a waterfall design for your benchtop. How easy was that?

Join in the conversation on our 3D Kitchen Design Australia – KD Max Facebook Group.
Do you have any handy tips that you use in KD Max? Send them through to info@cabinetsbycomputer.com and we will feature them on our website & Facebook page!

