Importing items into KD Max
Add further to the realism of your designs by taking advantage of the import feature in KD Max.
Check out our new tutorial video below to learn how to import and place items into your KD Max designs and library.
Transcript
1.
Navigate to File > Import 3DS and Skp file
Beside the file taskbar select the “…” button.
2.
Select your downloaded 3DS file and click Open
Select Convert to mm and Merge to Current scene, Select OK then Select OK again.
3.
Some Items will be brought in to the drawing at a larger scale. To resize Right Click > Resize
Tick Constrain Proportions – This allows you to input one dimension of the item and the other dimensions will adjust based off of your input measurement.
OK to Confirm your selection
4.
Rotate the item by 3 axis by using the edit tool (green arrow) and selecting the imported item.
From here orientate the item in the drawing to get a good representation of the item for the Add object to library.
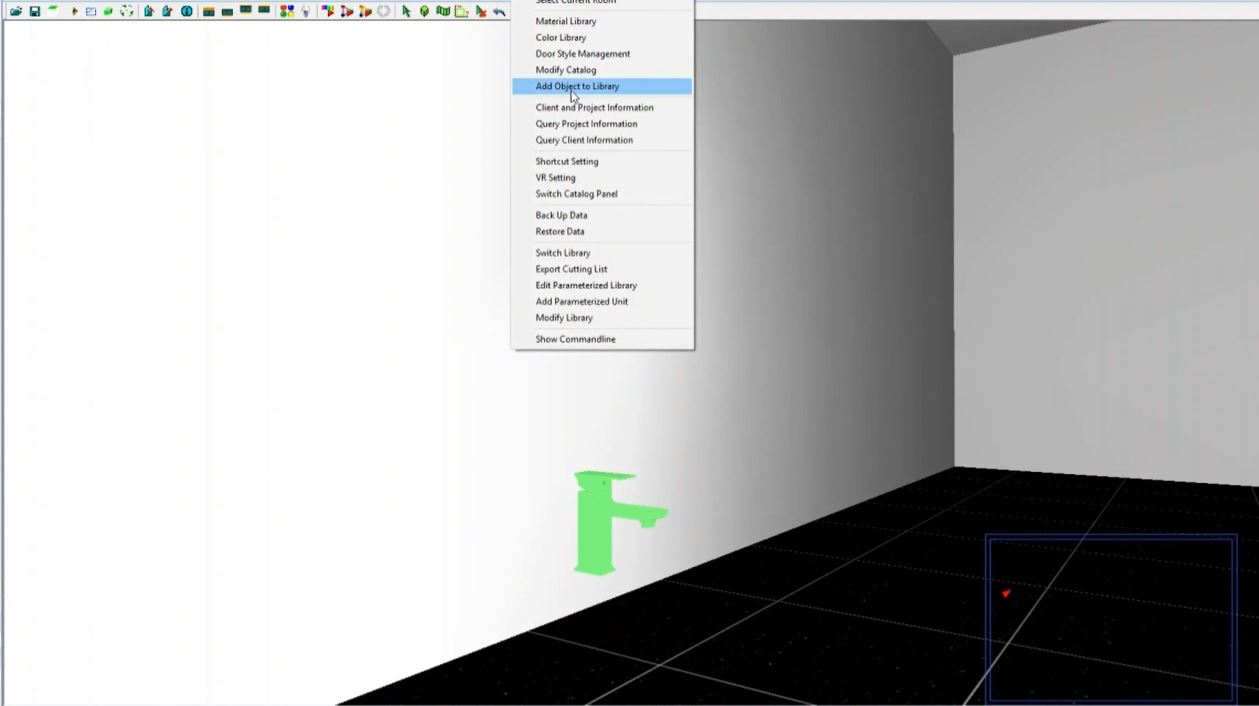
5.
Navigate to Settings > Add object to library, Select the imported item, Right click to confirm
Name the object and Select OK. A quick render will be produced for the items icon
Join in the conversation on our 3D Kitchen Design Australia – KD Max Facebook Group.
Proud of a design that you have made in KD Max? Send it through to info@cabinetsbycomputer.com and we will feature it on our website & Facebook page!