
Render Settings in KD Max
Want to improve the quality of your 3D renders using KD Max?
Follow these simple steps to learn how to adjust your rendering settings in KD Max!
1.
Firstly click the ‘Lights On’ button identified by a yellow light bulb on the KD Max toolbar. This will begin ray tracing the drawing and also turn the lights on.
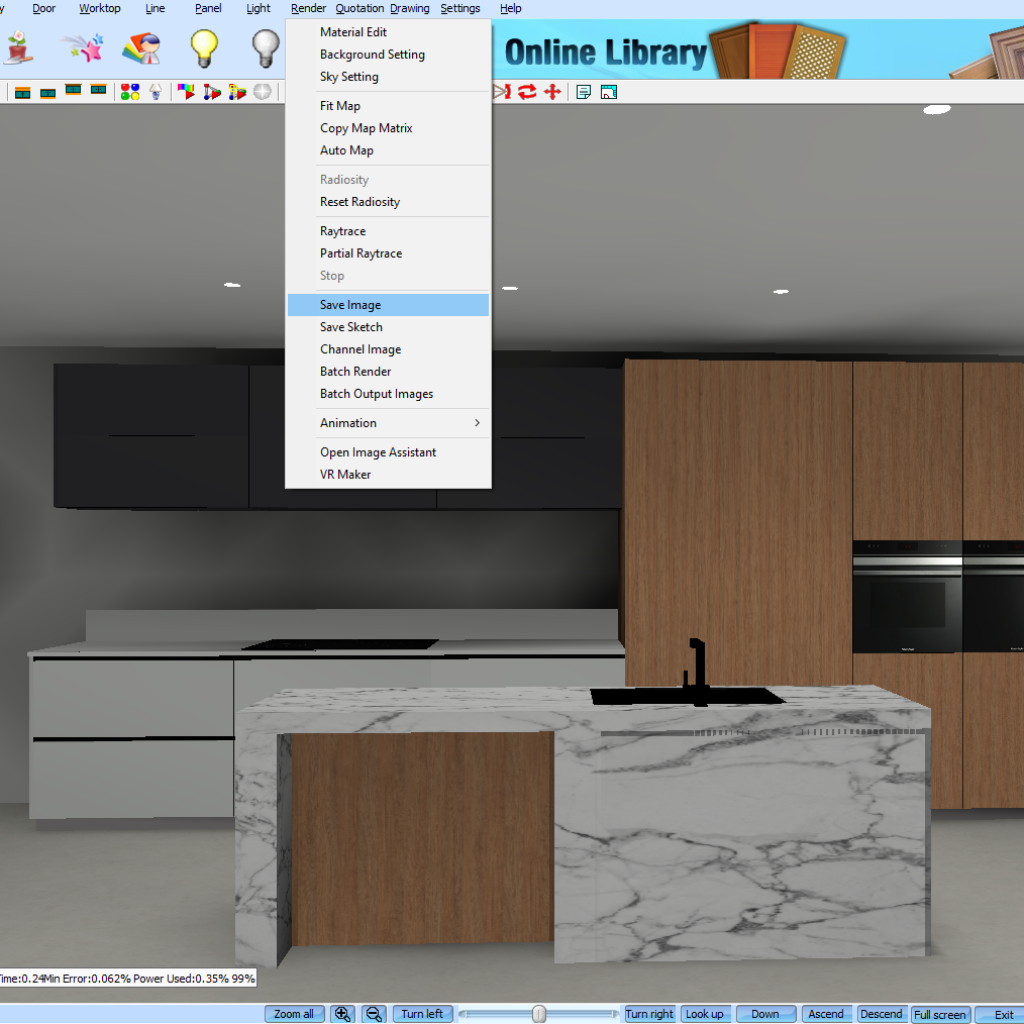
2.
Once the drawing has finished the ray trace process, navigate to Render > Save Image. KD Max will then ask the user to choose the destination of the file. Choose somewhere you will be able to locate the render when it has finished.
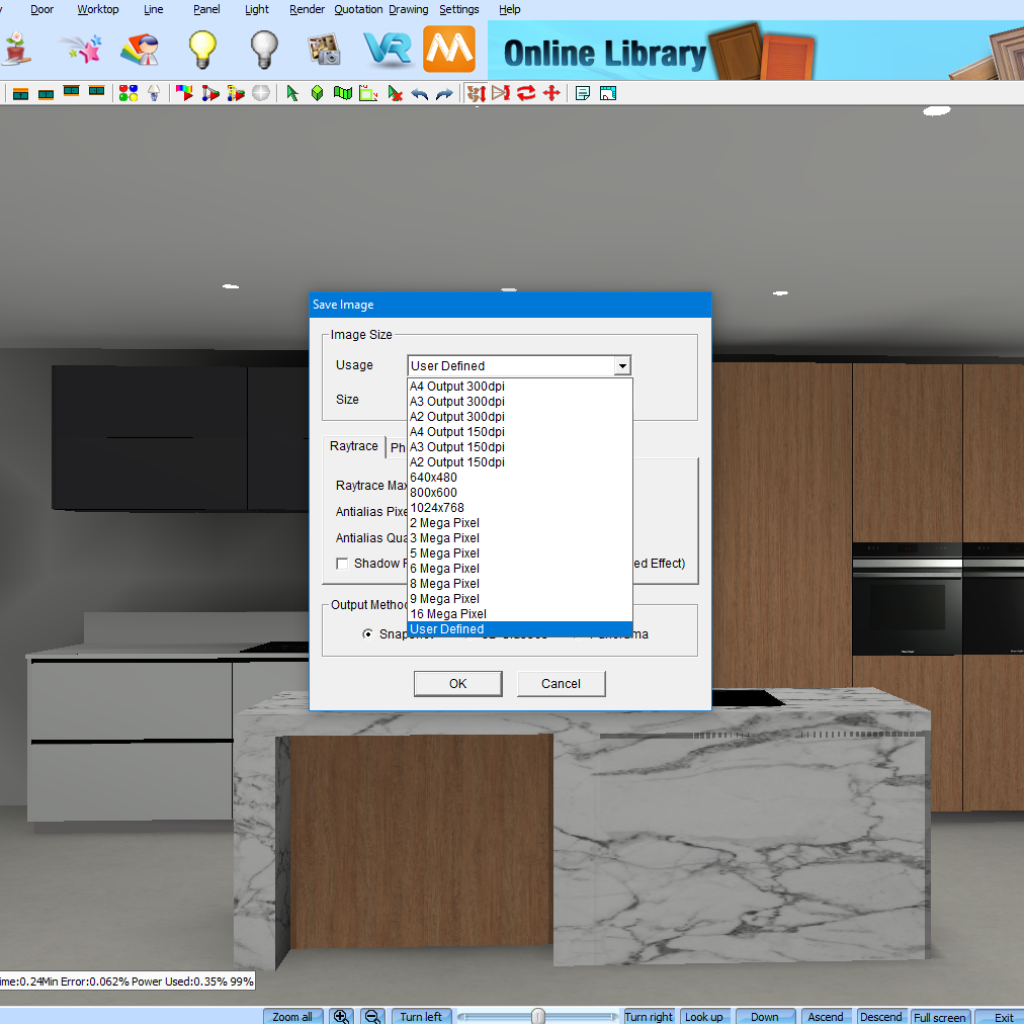
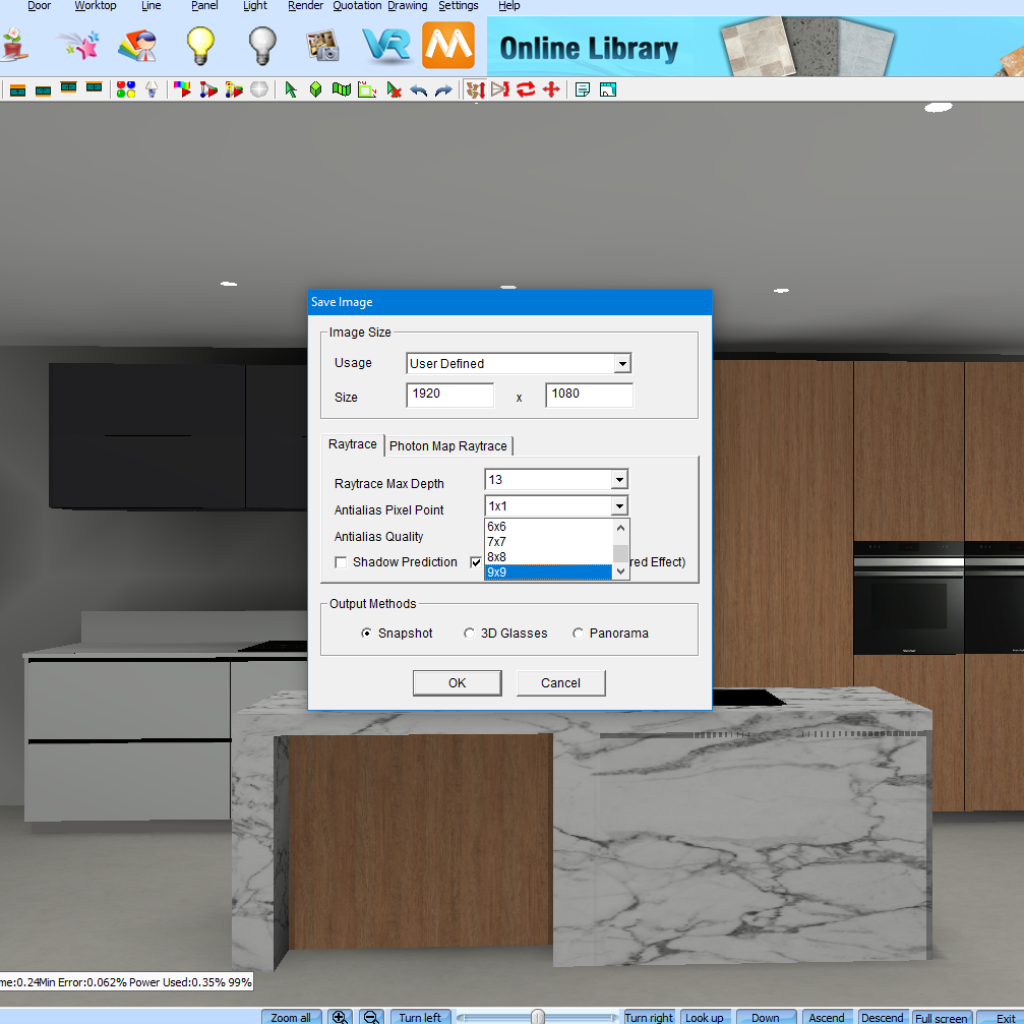
3.
Once you have chosen your save destination, a popup box with rendering settings will prompt. The first option KD Max will ask the user to choose is the Image Size. This will influence how long the render will take. A smaller image means a faster render. I have chosen User Defined and set the image size to 1920 x 1080.
4.
The next render setting to adjust is Ray trace Max Depth. This setting determines how much detail is processed by each frame of the render process. The higher this setting is set the more detailed the render will be.
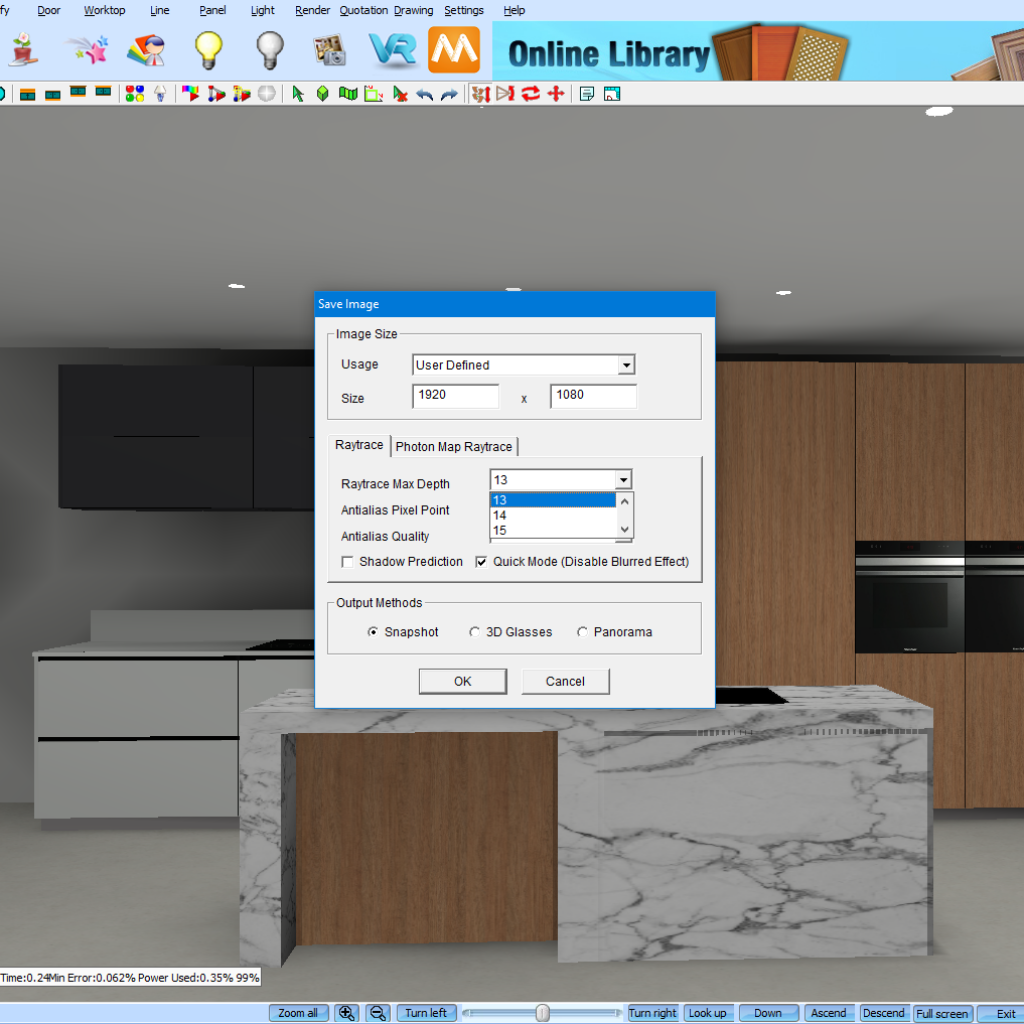
5.
The next render setting to adjust is Anti alias Pixel Point. This setting determines the size of the rendering frames. The higher this setting is set the more detailed the render will be.
6.
The next render setting to adjust is Anti Alias Quality. The higher this setting is set the more detailed the render will be.

7.
The last render settings are Shadow Prediction and Quick Mode. I have disabled both of these settings in my drawing.
8.
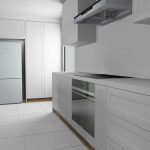
Once the settings have all been adjusted, click OK to begin the rendering process. The higher the settings have been set, the longer the render process will take.
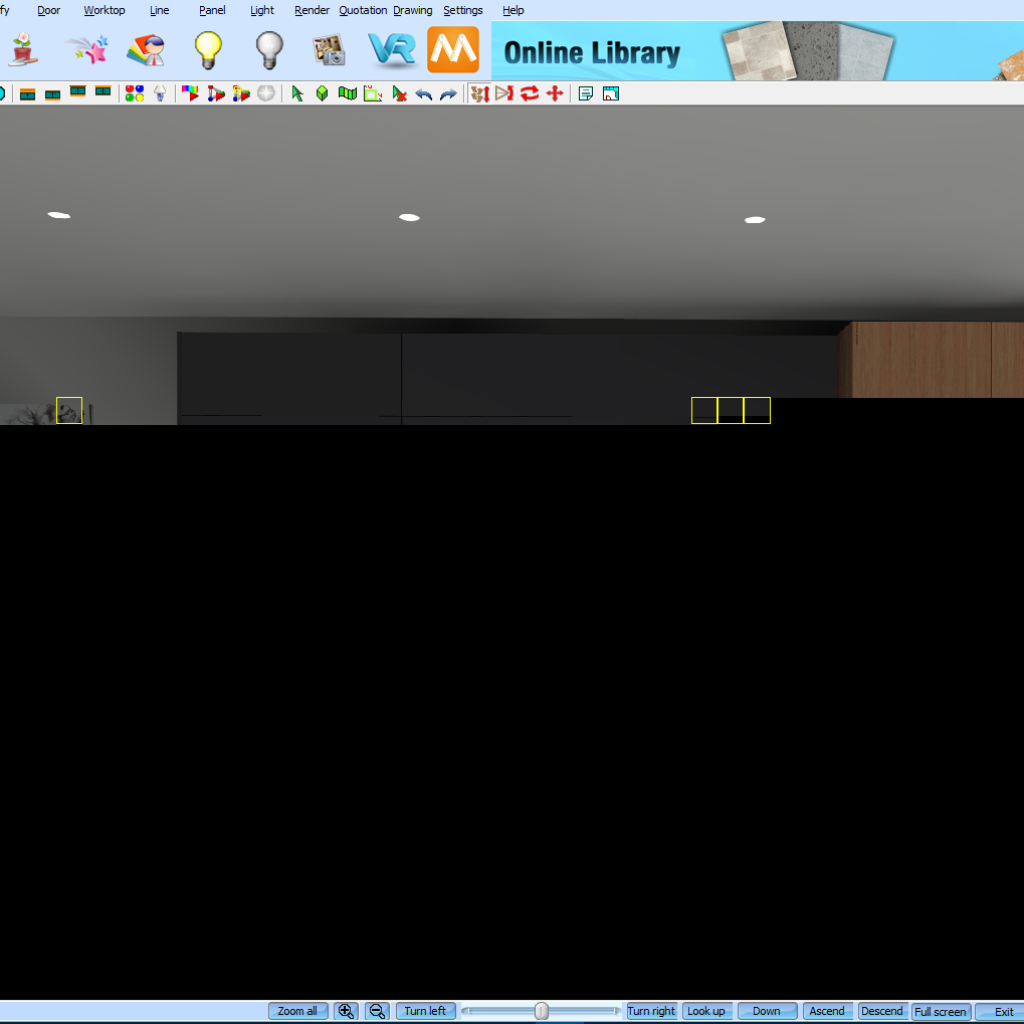
9.
Once the render has completed, navigate to where you chose to save the file.
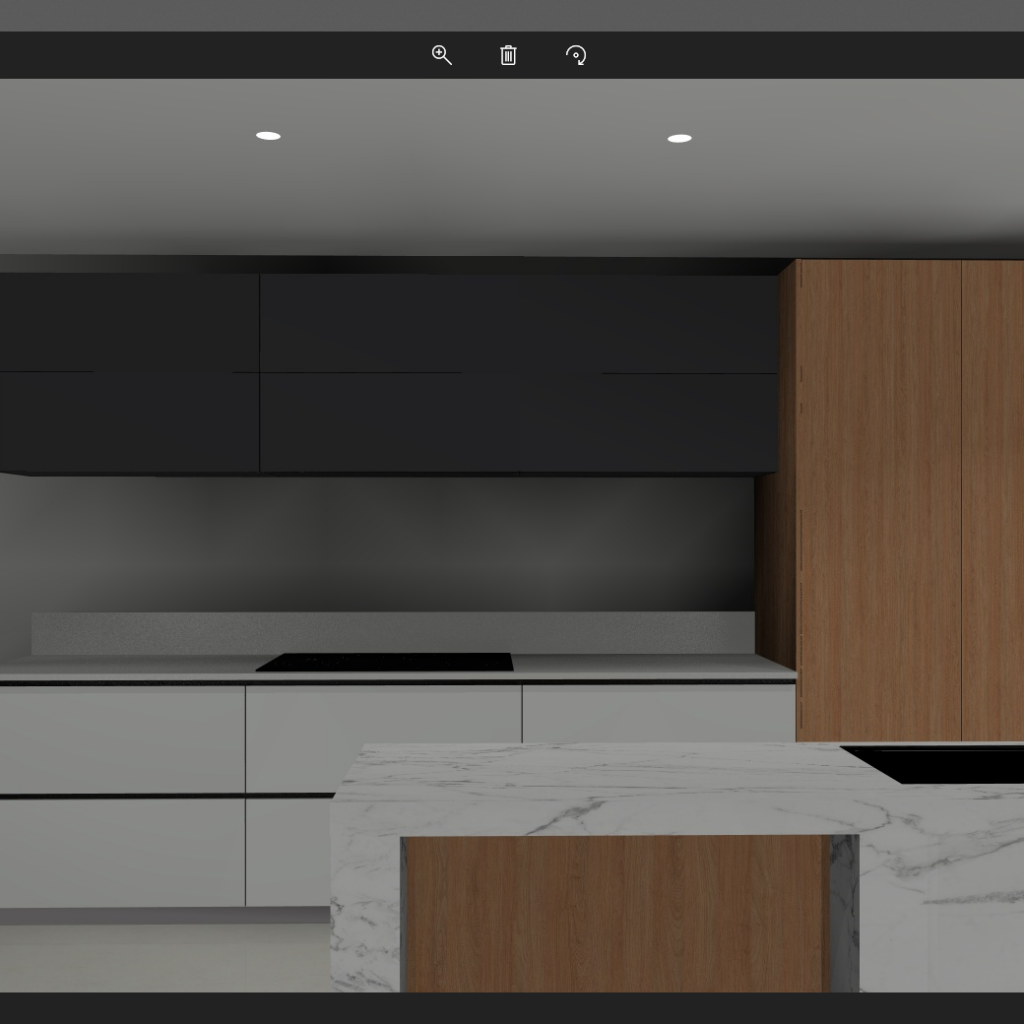
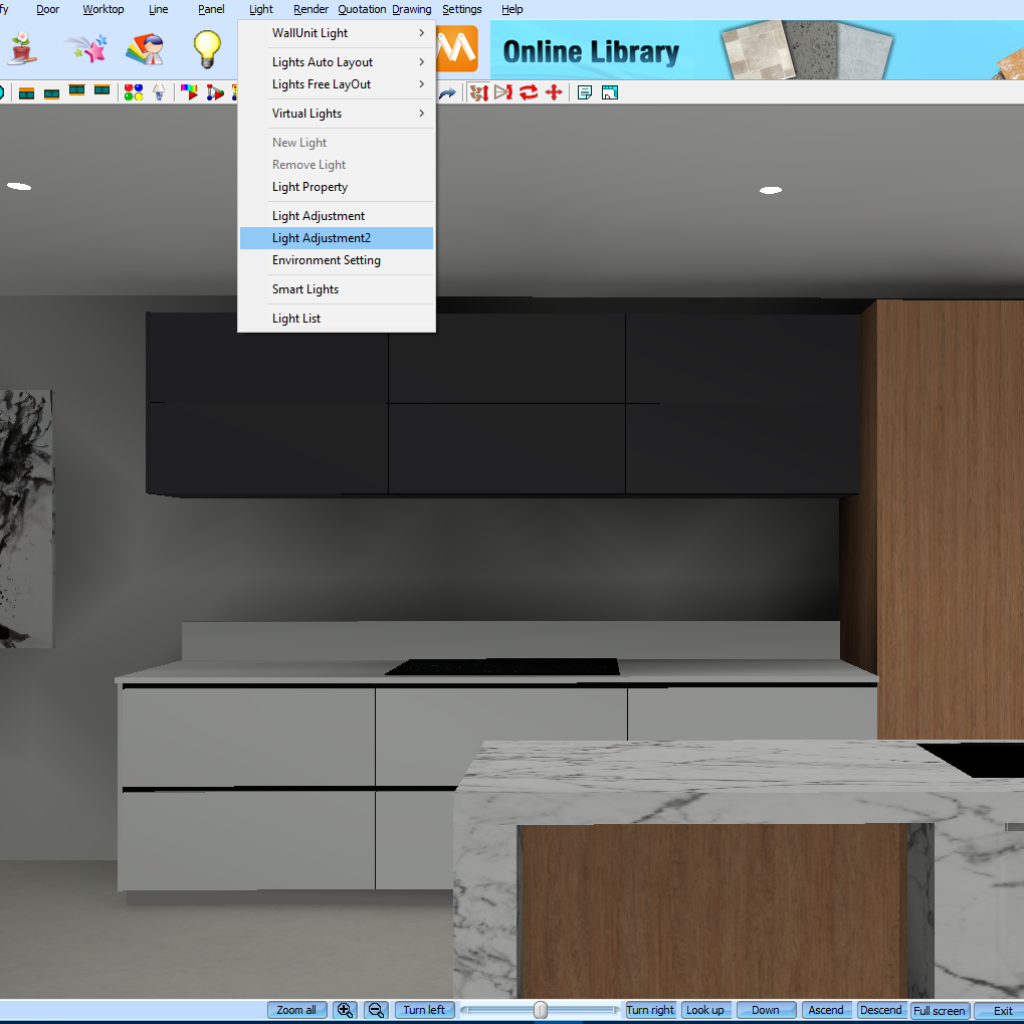
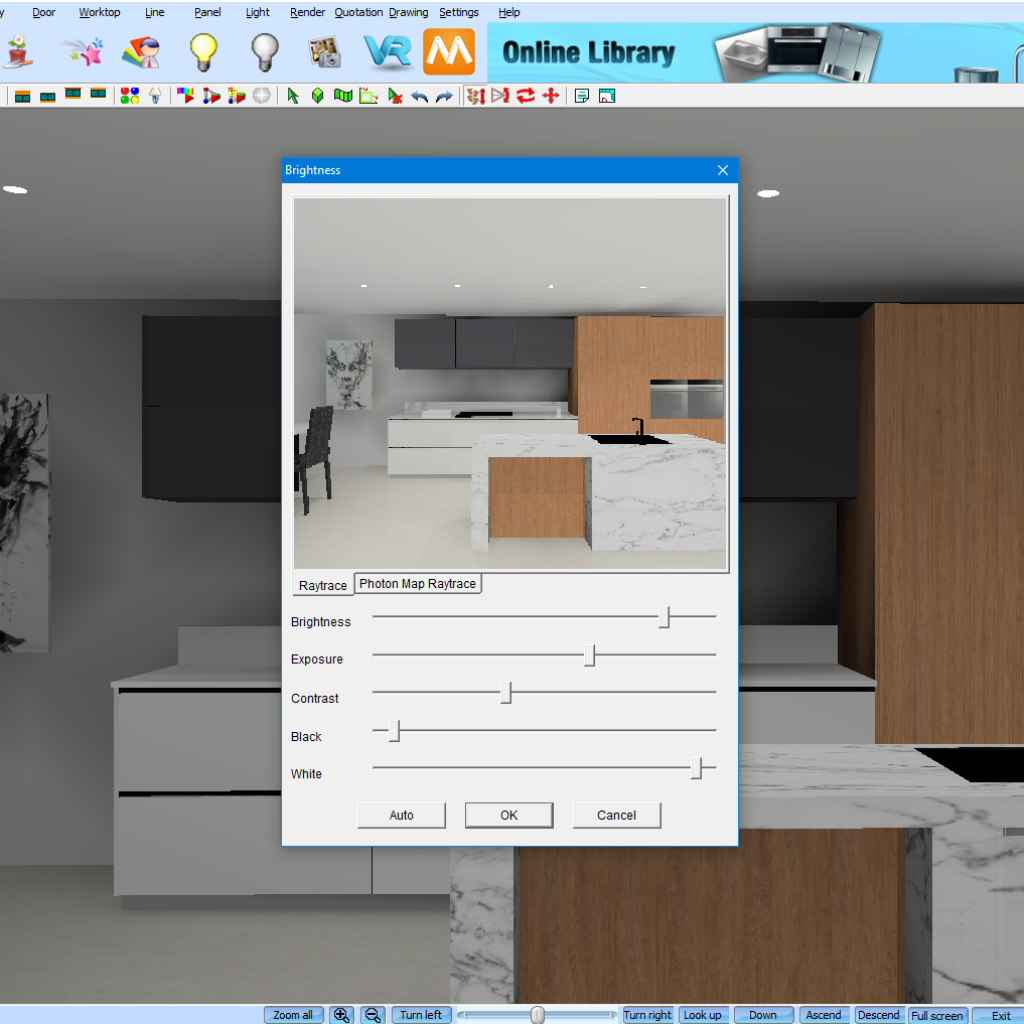
10.
The brightness and contrast of the render can be adjusted by navigating to Light > Light Adjustment 2.
11.
Here you can change the brightness, exposure, contrast and black / white values of your final render.
12.
Now render the image again until you’re happy with the results.

Join in the conversation on our 3D Kitchen Design Australia – KD Max Facebook Group and share your 3D designs with our growing community.
Book your training session today! Send an enquiry to info@cabinetsbycomputer.com


