
Printing Plans & Elevations
Tutorial Difficulty: Beginner
Follow these simple steps to learn how to print 2D shop drawings from your 3D drawings.
Looking to print out 2D plans and elevations of your 3D designs? KD Max allows you to instantly generate plans once you have finished your design process.

Step 1
Navigate to drawing > output drawing to begin generating your 2D plans.
")
Step 2
You’ll now be given the ability to select which views you’d like to generate. Once you have made a selection, click OK.
")
Step 3
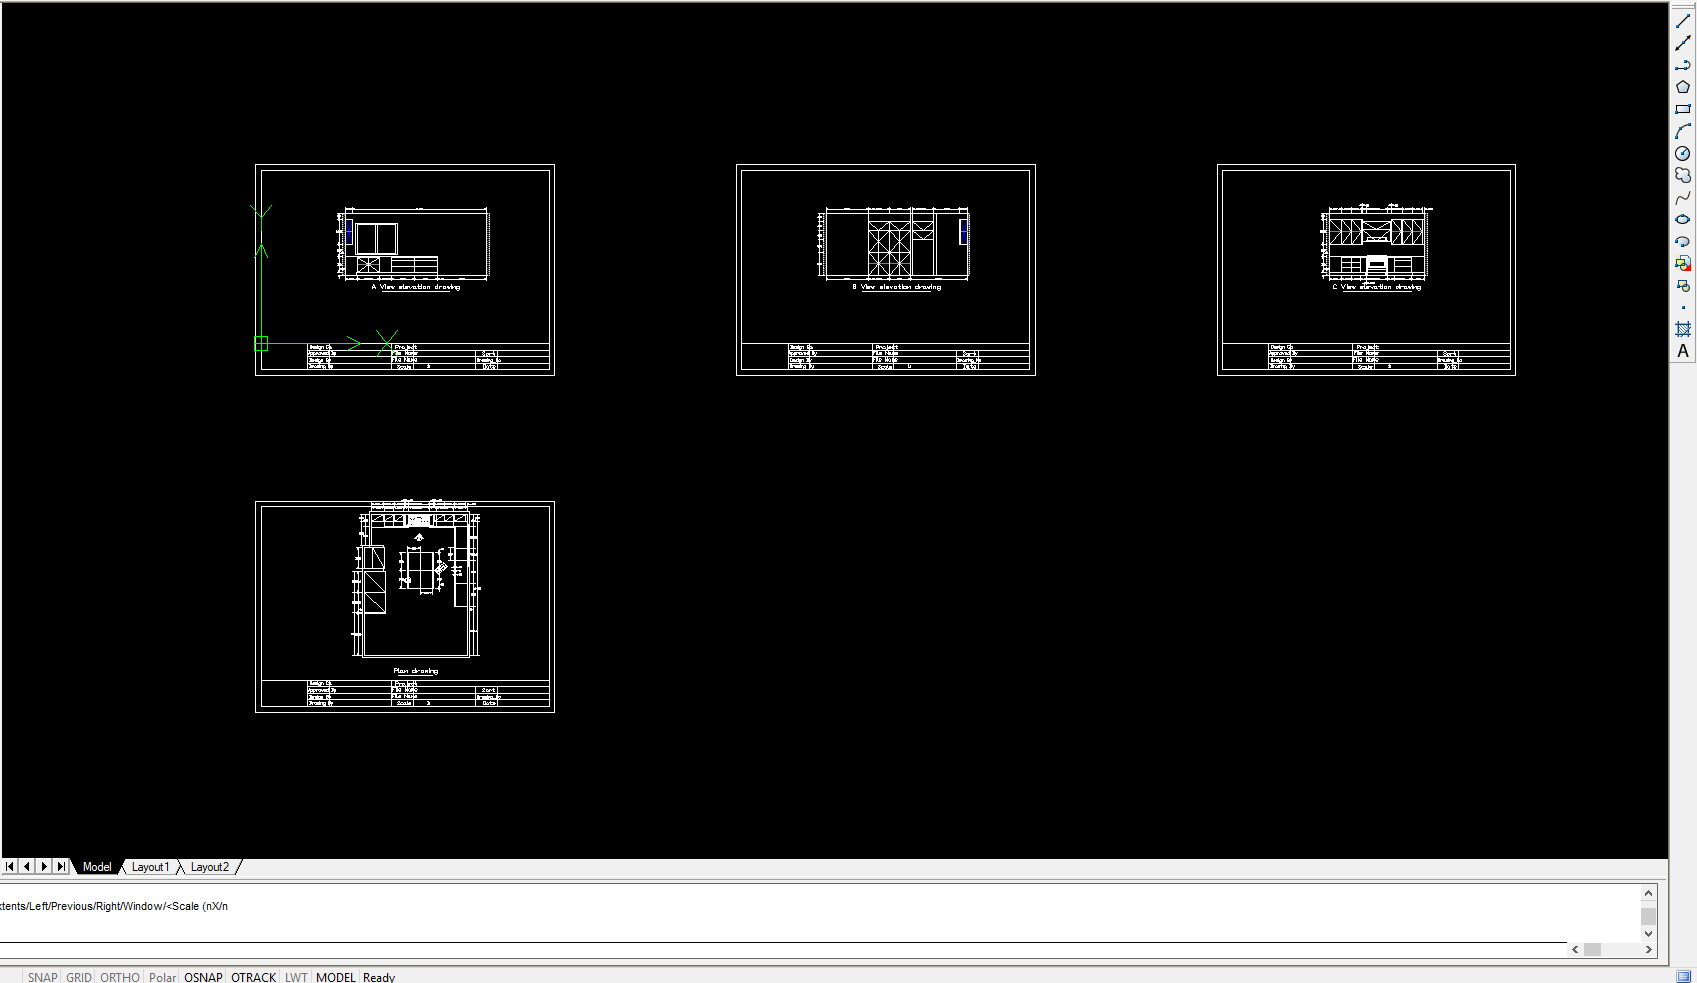
A window will open called BTOCad with the views selected earlier. BTOCad allows you to modify the plans as required, this will not affect your KD Max drawings.
")
Step 4
Using the mouse wheel to scroll, zoom onto the first plan that needs to be printed. Now navigate to File > Plot.
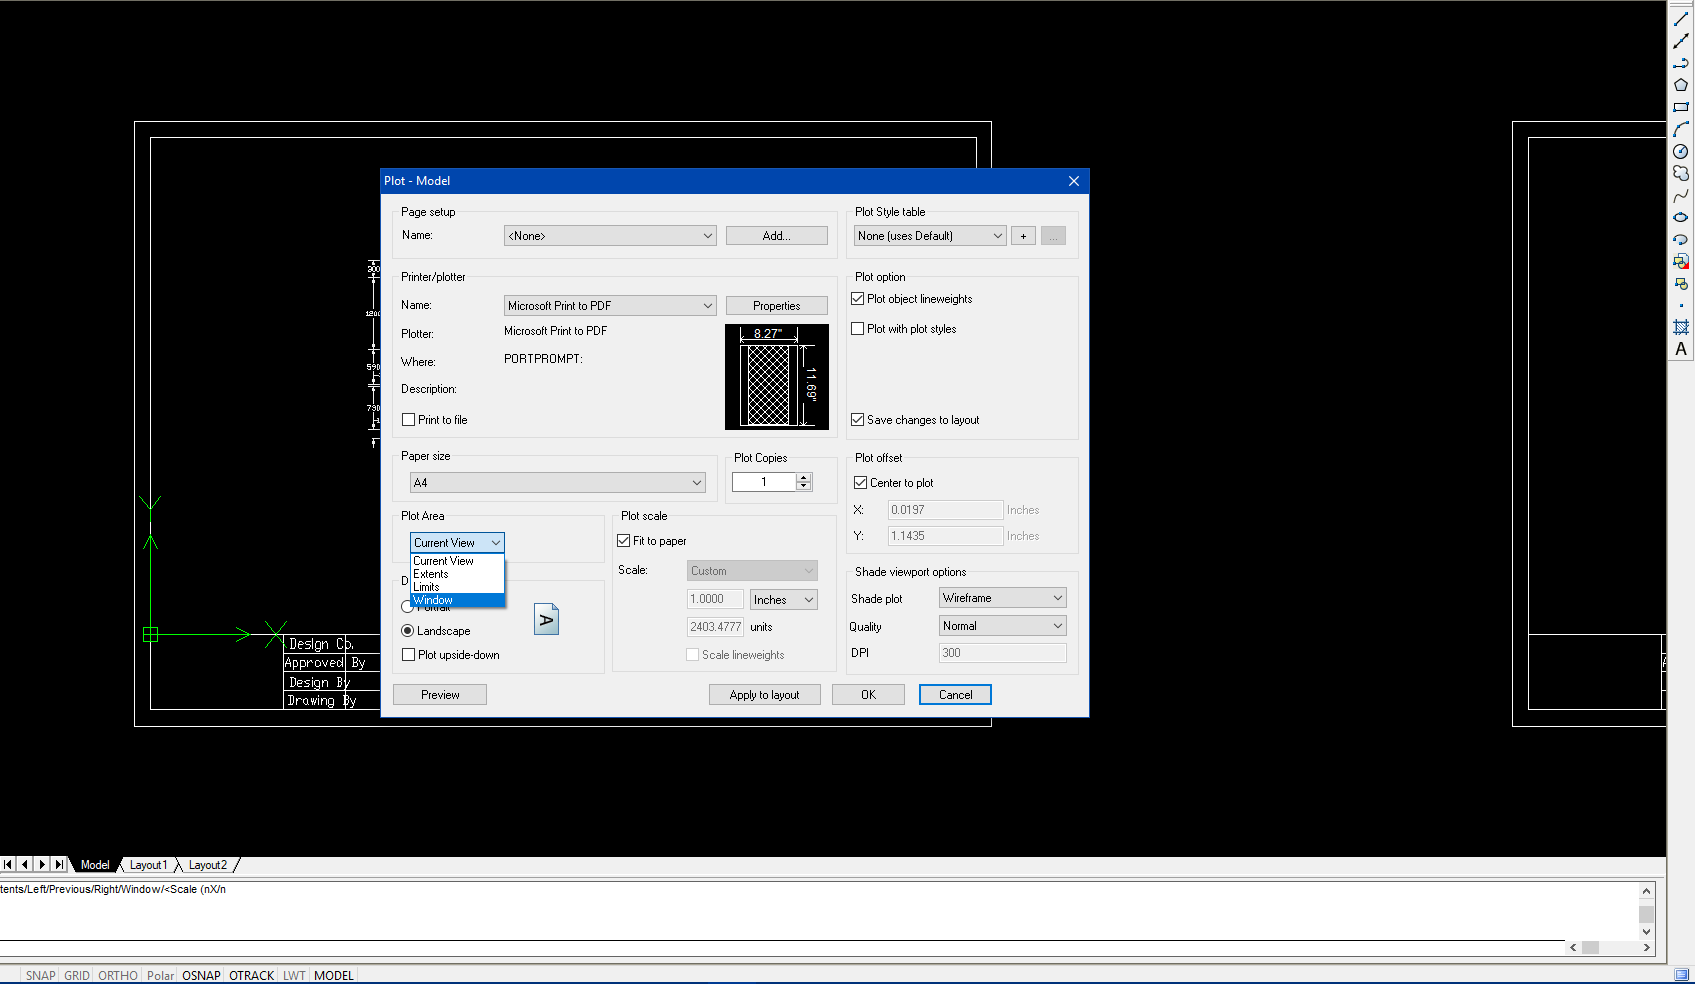
Step 5
Setup your plot settings as required. If you’d like to generate a PDF of your plans, select Microsoft Print to PDF as your printer. Select Window under Plot Area, you’ll now be able to draw a box over what you’d like to print by using the left mouse click. Ensure that Plot Scale is set to Fit to Paper. Now simply hit OK to begin printing.


