
Creating Bulkheads In KD Max
So you need to extend the height of your cabinets, but not sure how to complete the look using KD Max?
Here we go through the steps necessary to create a bulkhead for your overhead cabinets in KD Max.
1.
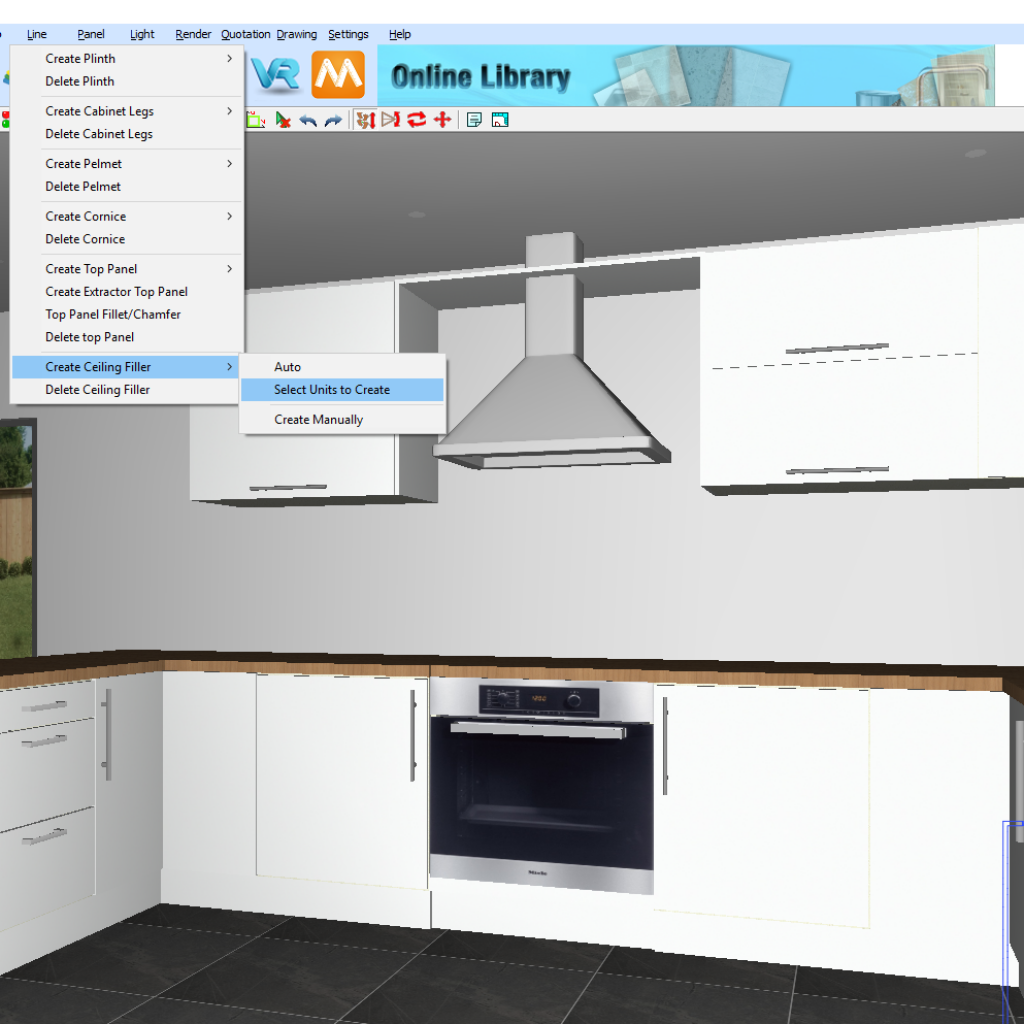
First you need to navigate to Line>Create Ceiling Filler>Select Units To Create. This will then allow you to manually select the units that you would like to install a bulkhead on.
2.
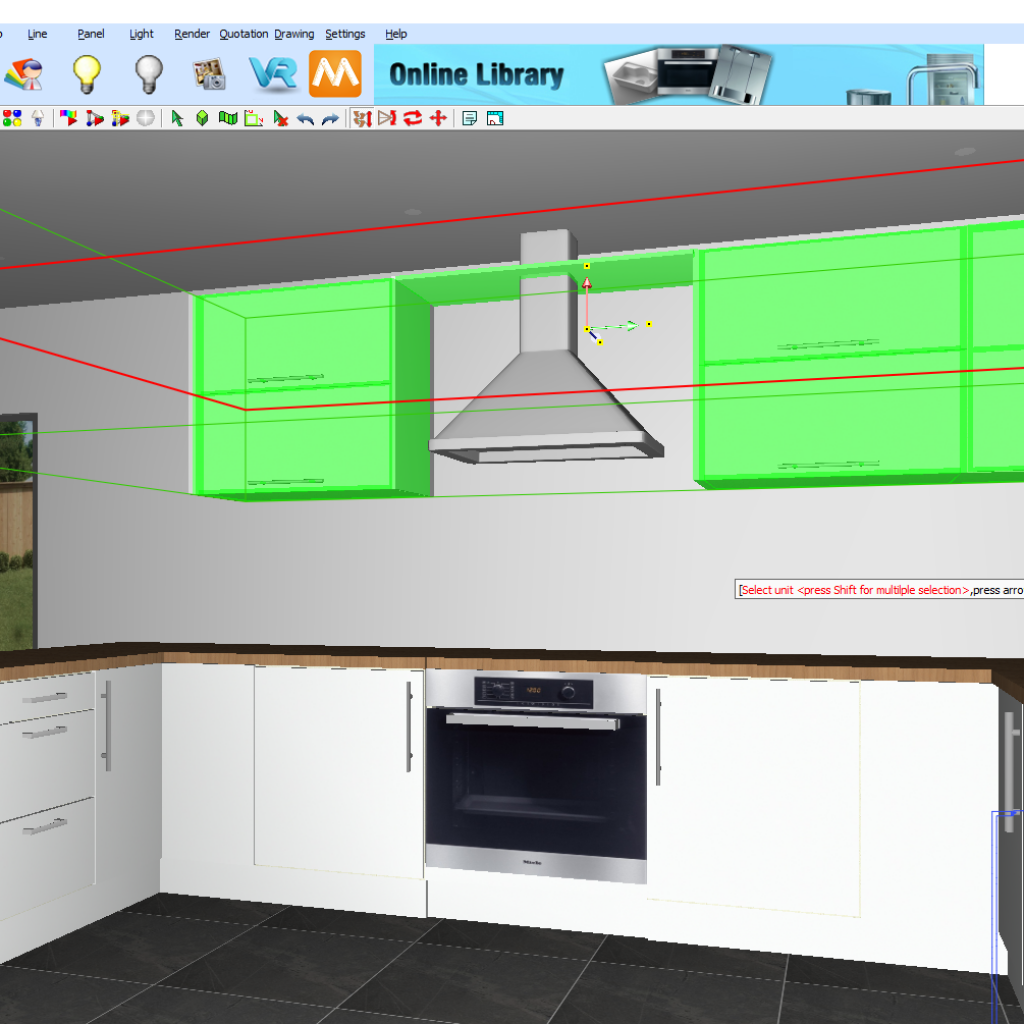
Once you have selected the units you would like to install the bulkhead on, right click your mouse to confirm the selection. This will then prompt a pop-up box.
3.
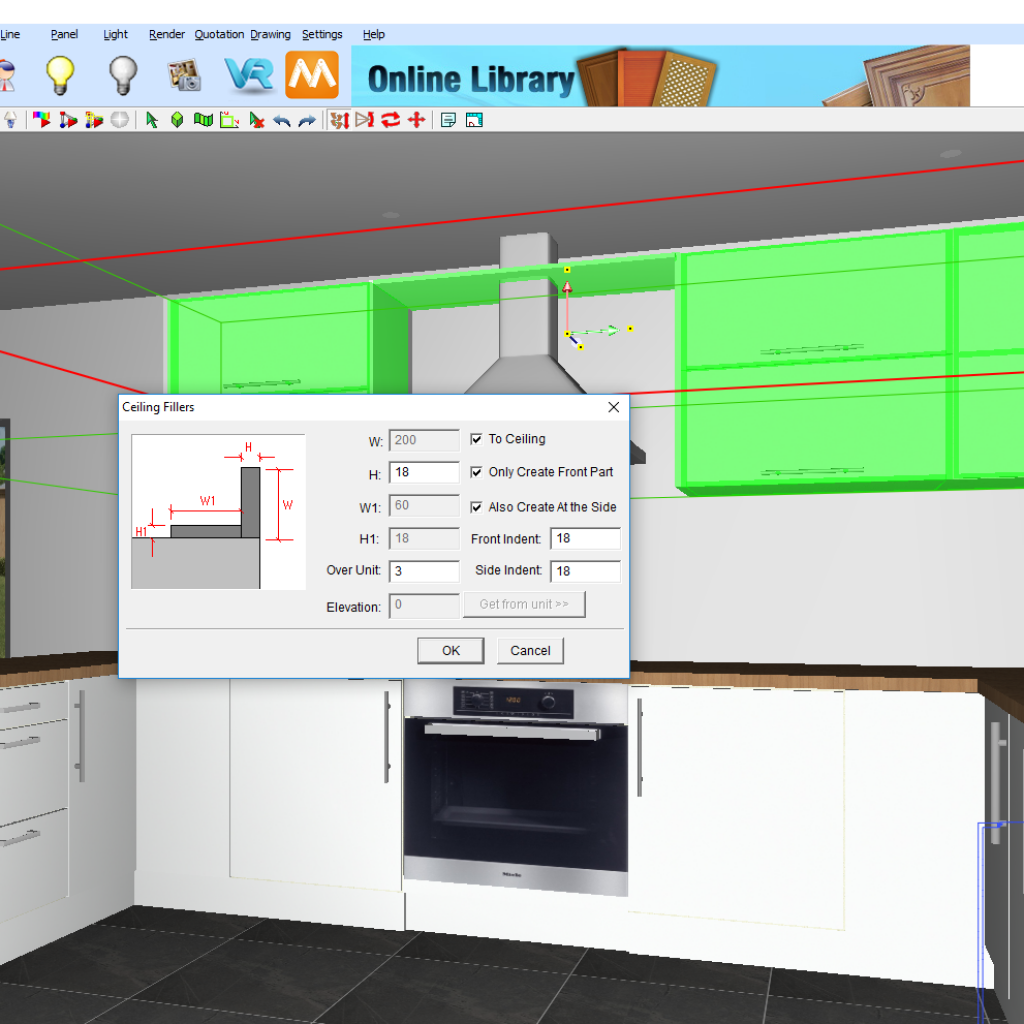
In the Ceiling Fillers pop-up, prompt the fields as required. Over Unit will lift the bulkhead off the unit by the chosen measurement. In this example, I have set this to 3 to lift the bulkhead 3mm above my unit, creating a shadow line. Front and Side Indent relates to how I would like my bulkhead to be positioned. 18mm will result in the bulkhead sitting flush with the cabinets carcass. As I would like my bulkhead flush with my cabinets door and side panels. I will be setting this to 0.
4.
Once you are happy with your measurements, hit OK to create you bulkhead.
Join in the conversation on our 3D Kitchen Design Australia – KD Max Facebook Group.
Proud of some designs that you have made in KD Max? Send them through to info@cabinetsbycomputer.com and we will feature it on our website & Facebook page!


