Creating a Ceiling Cornice
Need to add a finishing touch to your design but not sure what to do?
This tutorial will run over how to create a ceiling cornice to add that last touch to your KD Max design. A super simple tutorial as sometimes the crucial part is just knowing where to look.
Transcript
1.
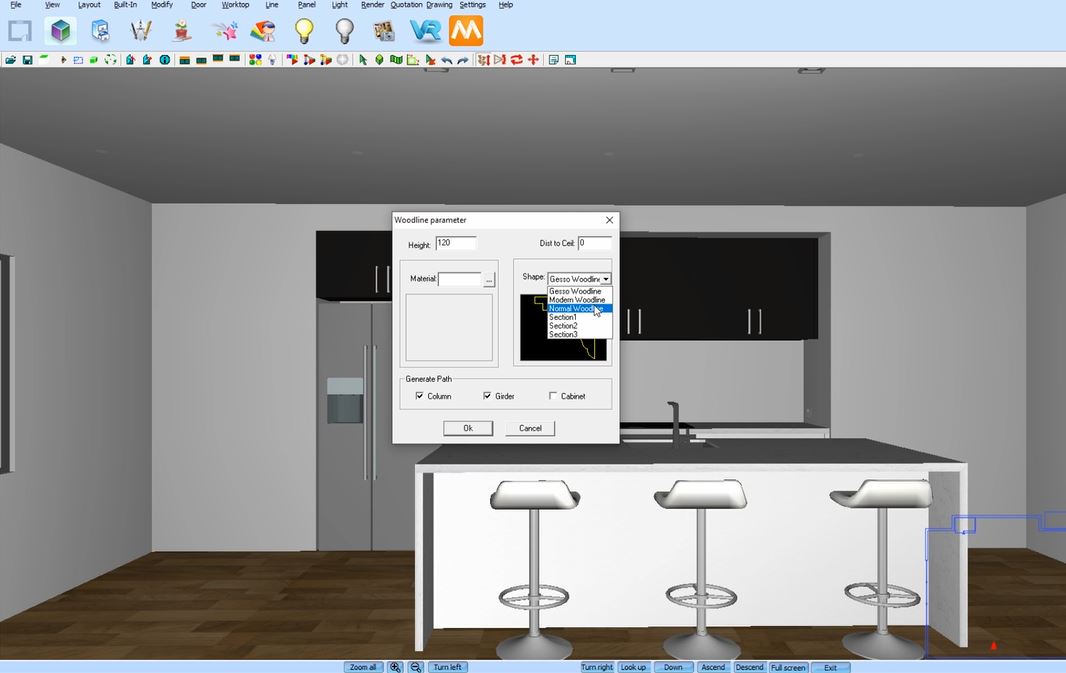
Navigate to Layout > Make Ceiling Cornice
From there, select your cornice height, distance to the ceiling, material and style.
Select the applicable checkboxes. To ensure that the cornice traces around the bulkhead, select the cabinet check box.
Join in the conversation on our 3D Kitchen Design Australia – KD Max Facebook Group.
Proud of a design that you have made in KD Max? Send it through to info@cabinetsbycomputer.com and we will feature it on our website & Facebook page!
Recommended Posts


