V10 | Creating a LED Light Source in KD Max
Are you looking to add LED lighting underneath your vanity or unit.
Here we go through the steps necessary to represent LED lighting in your KD Max designs.
1.
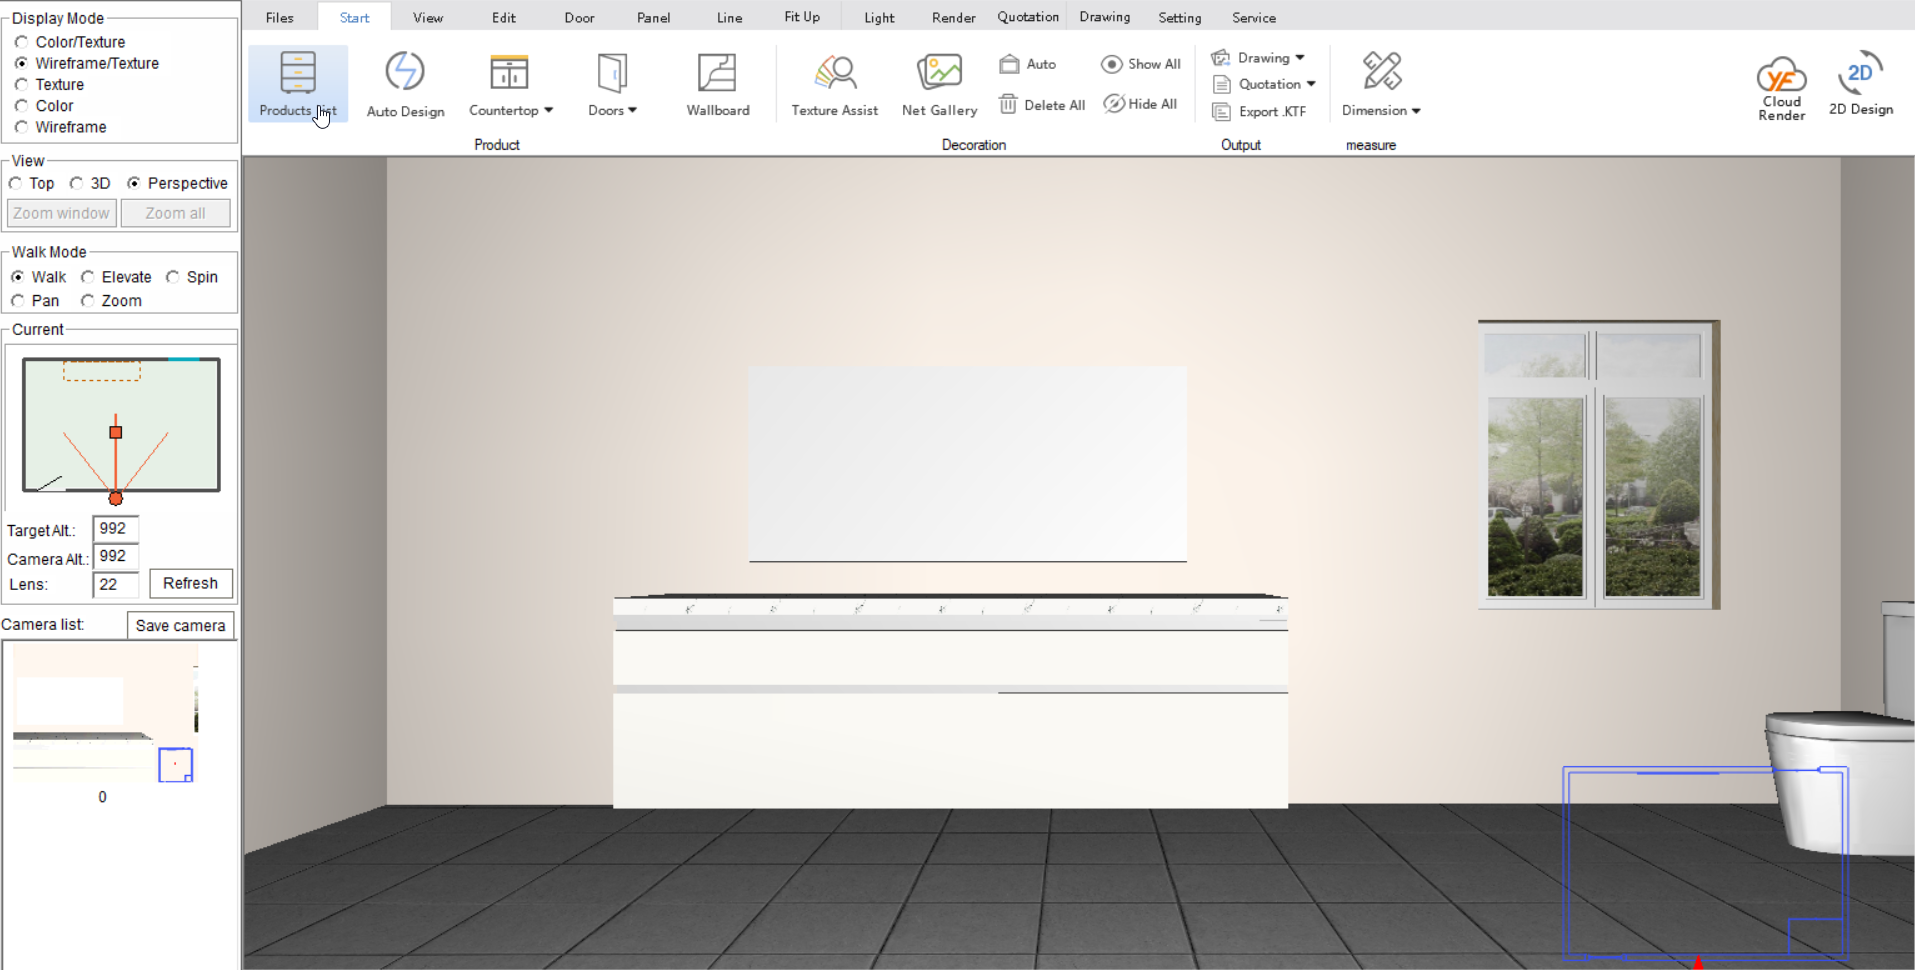
Once your design is all drawn up and you’re ready to start adding some lighting, navigate to Product List to open the library.
2.
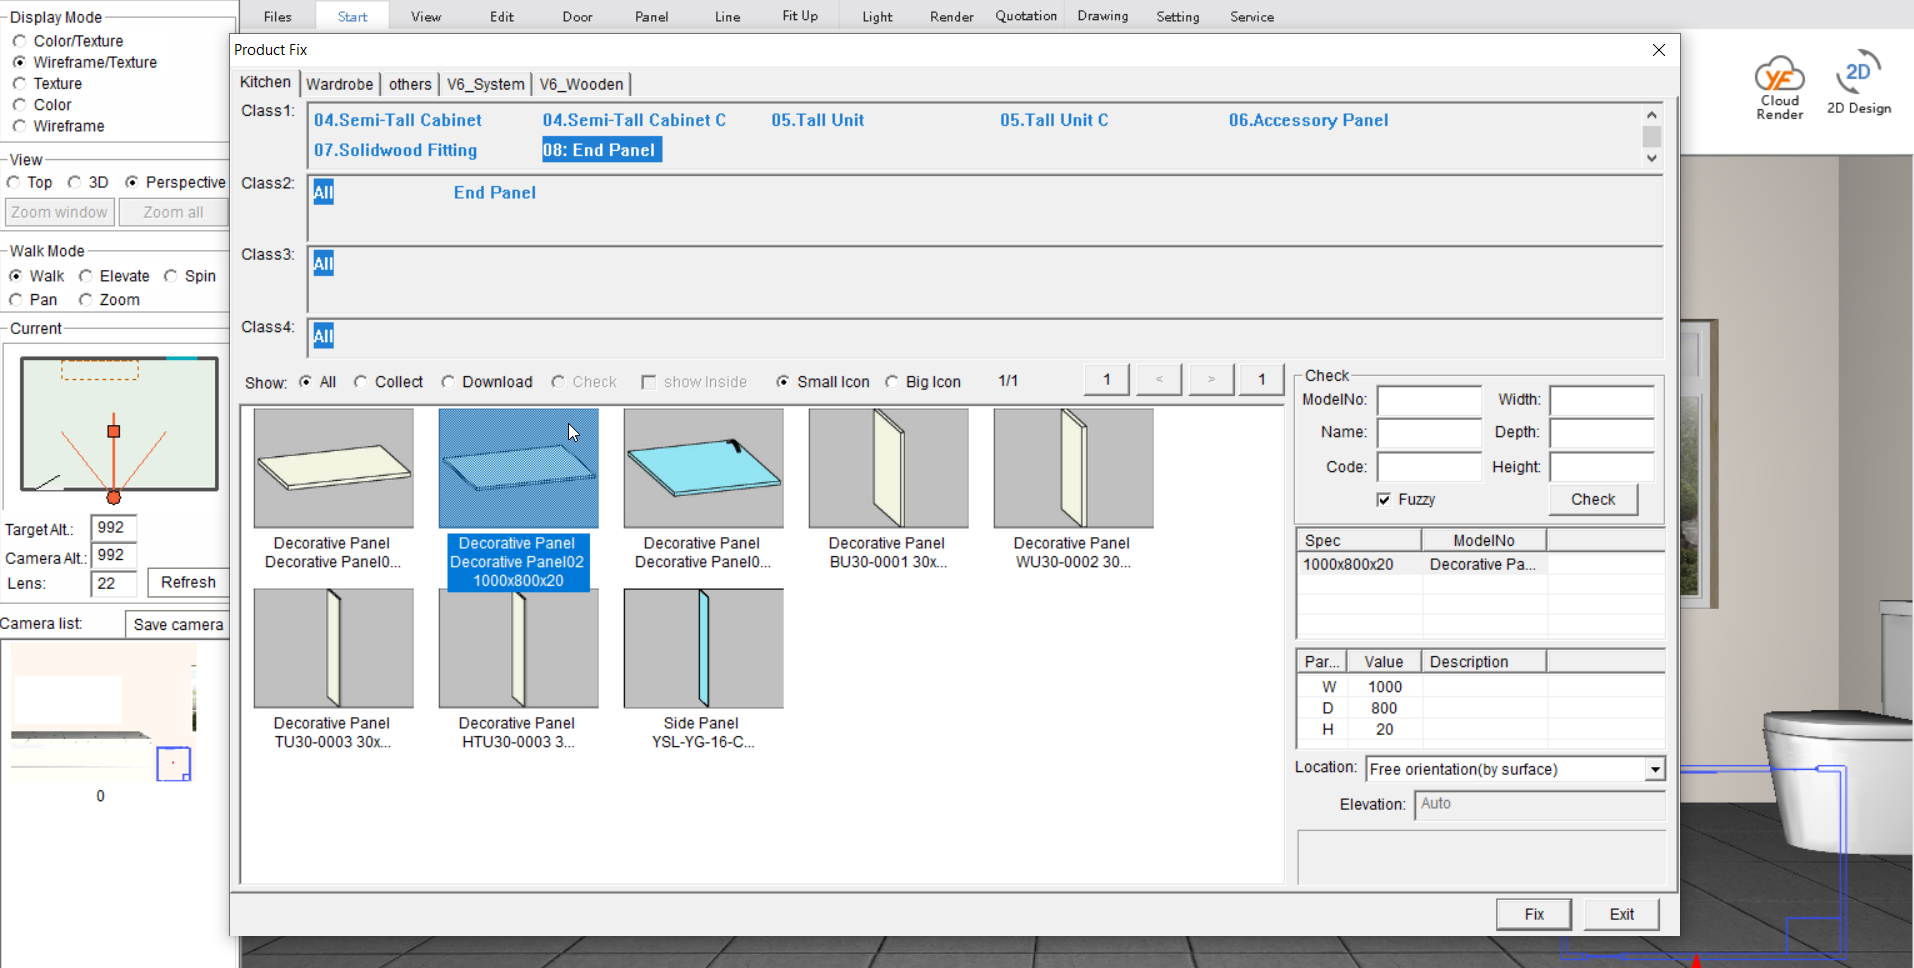
Now select Kitchen> End Panel and then select the Decorative Panel 02.
This will be used as our LED strip.
3.
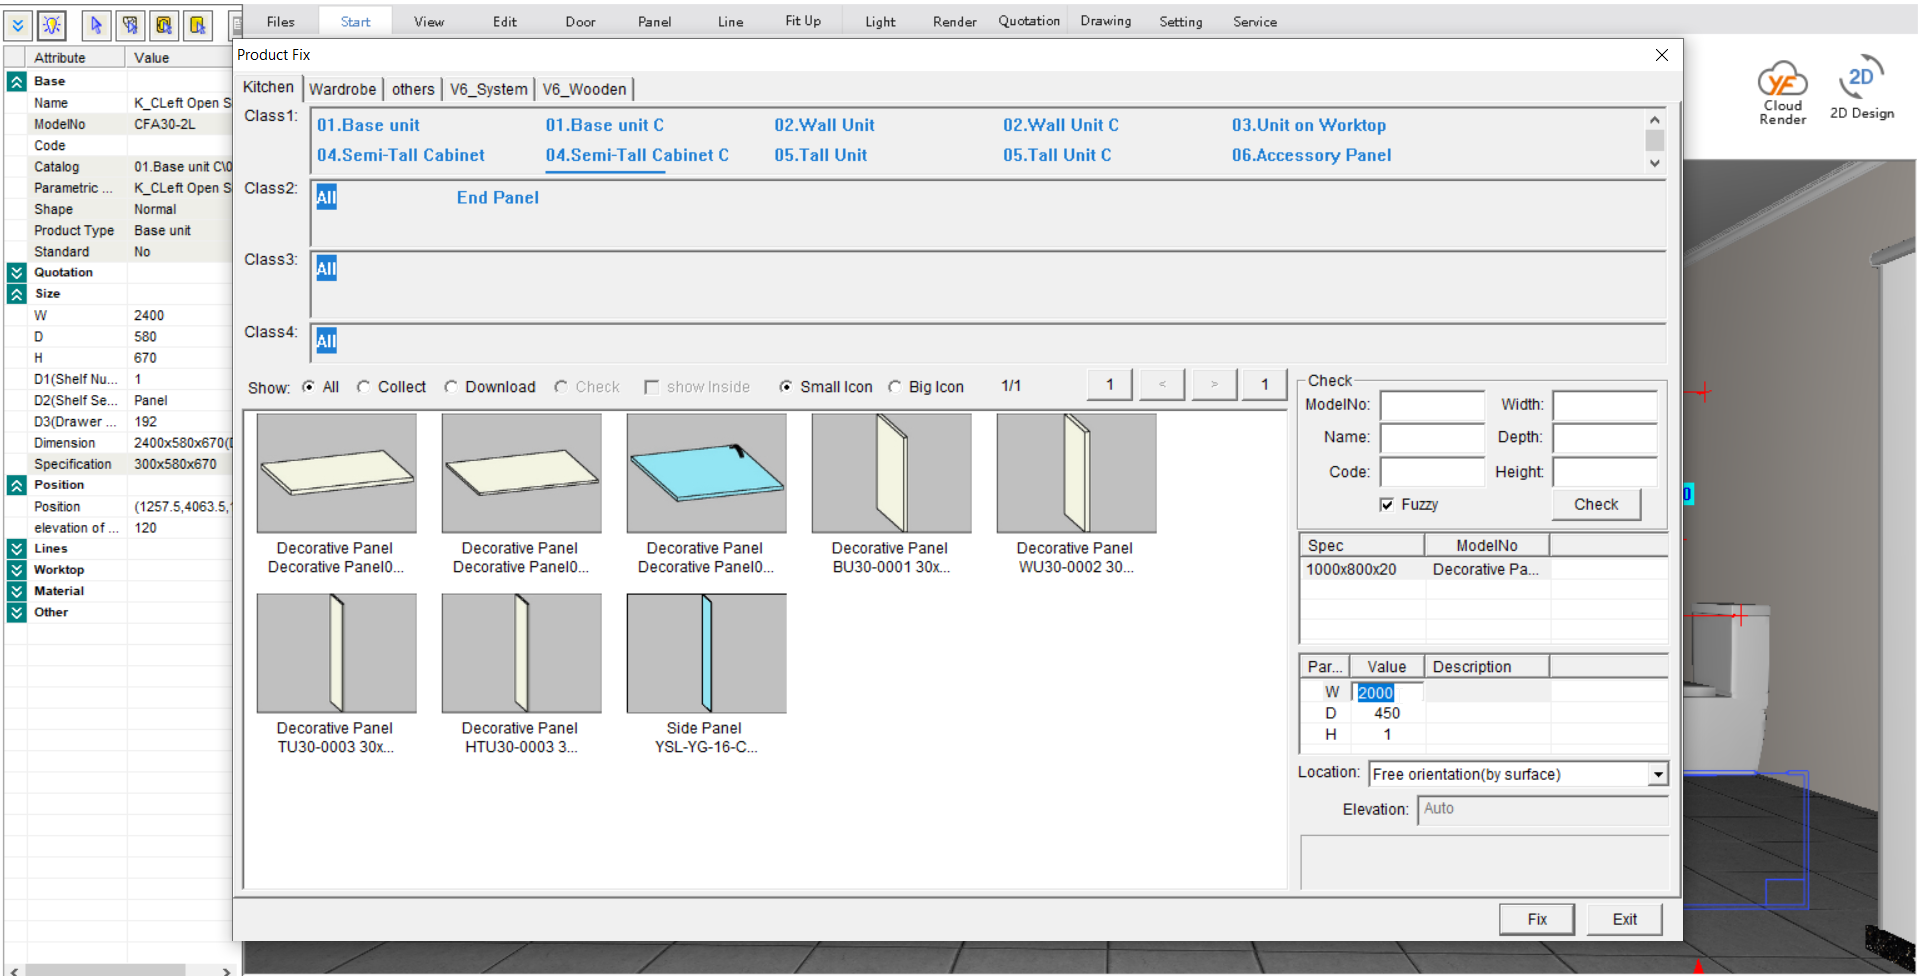
Enter the size for the decorative panel and click Fix.
For the best results, make the decorative panel shorter in width and depth than the cabinets it is sitting under. The dimensions of the cabinets placed in this drawing are W x 2400, D x 580 so we have made our panel W x 2000, D x 450 H x 1.
Set the height as low as possible so the strip is not visible in the design.
Now place this on the ground underneath where you’d like the light to sit.
4.
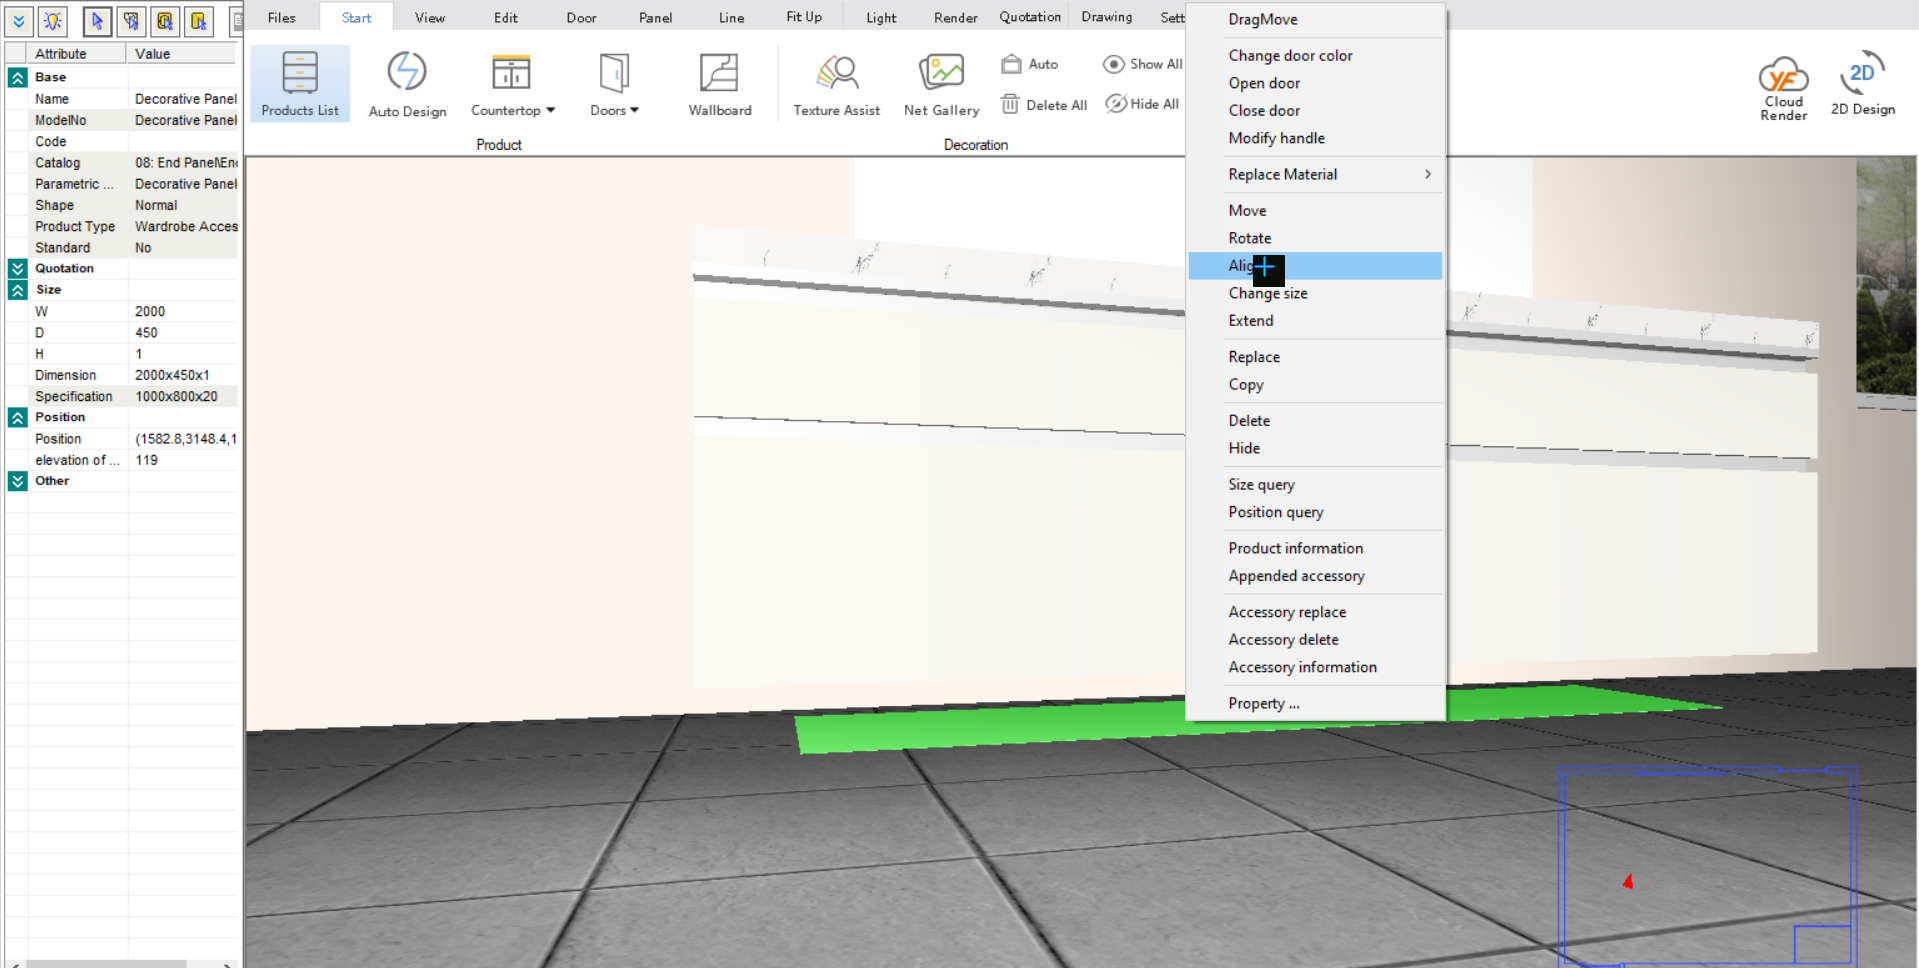
Now right click on the decorative panel that has just been placed.
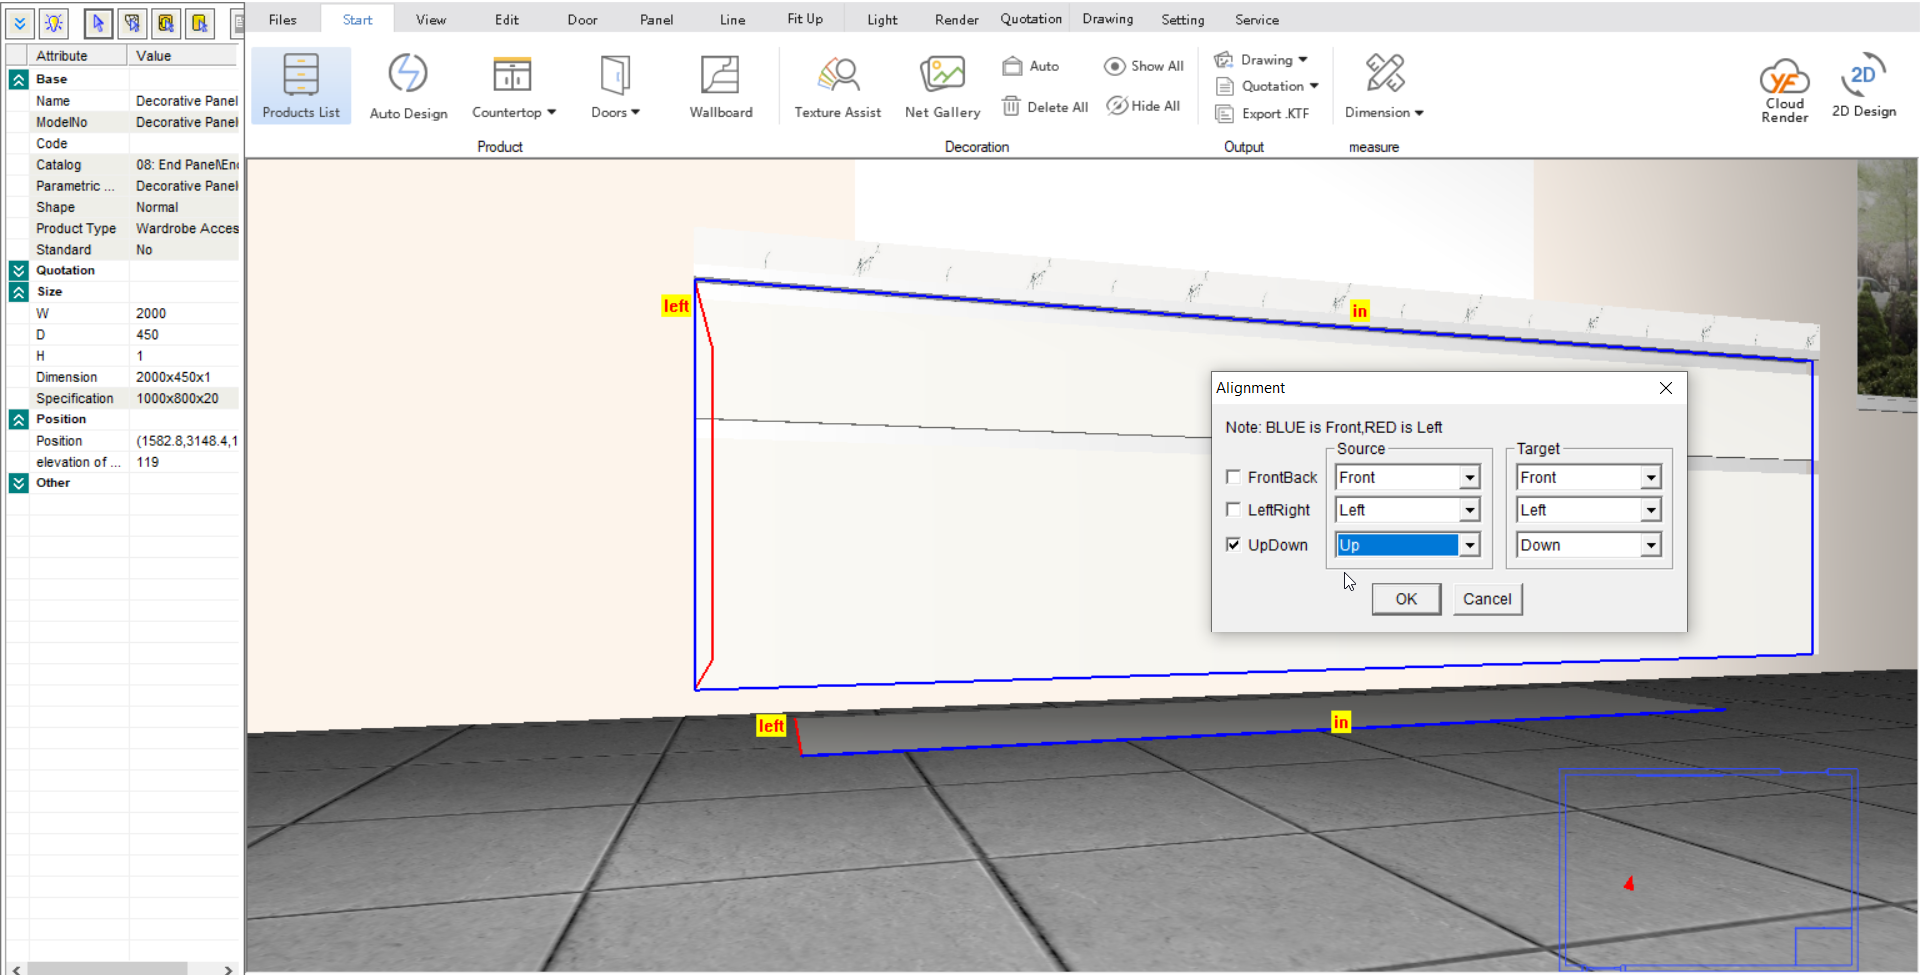
To place this underneath the cabinetry where it will not be visible, use the Align feature.
Select the checkbox that states Up/Down. Now select up for the source. This will align the decorative panel to the bottom of the cabinet carcase.
5.
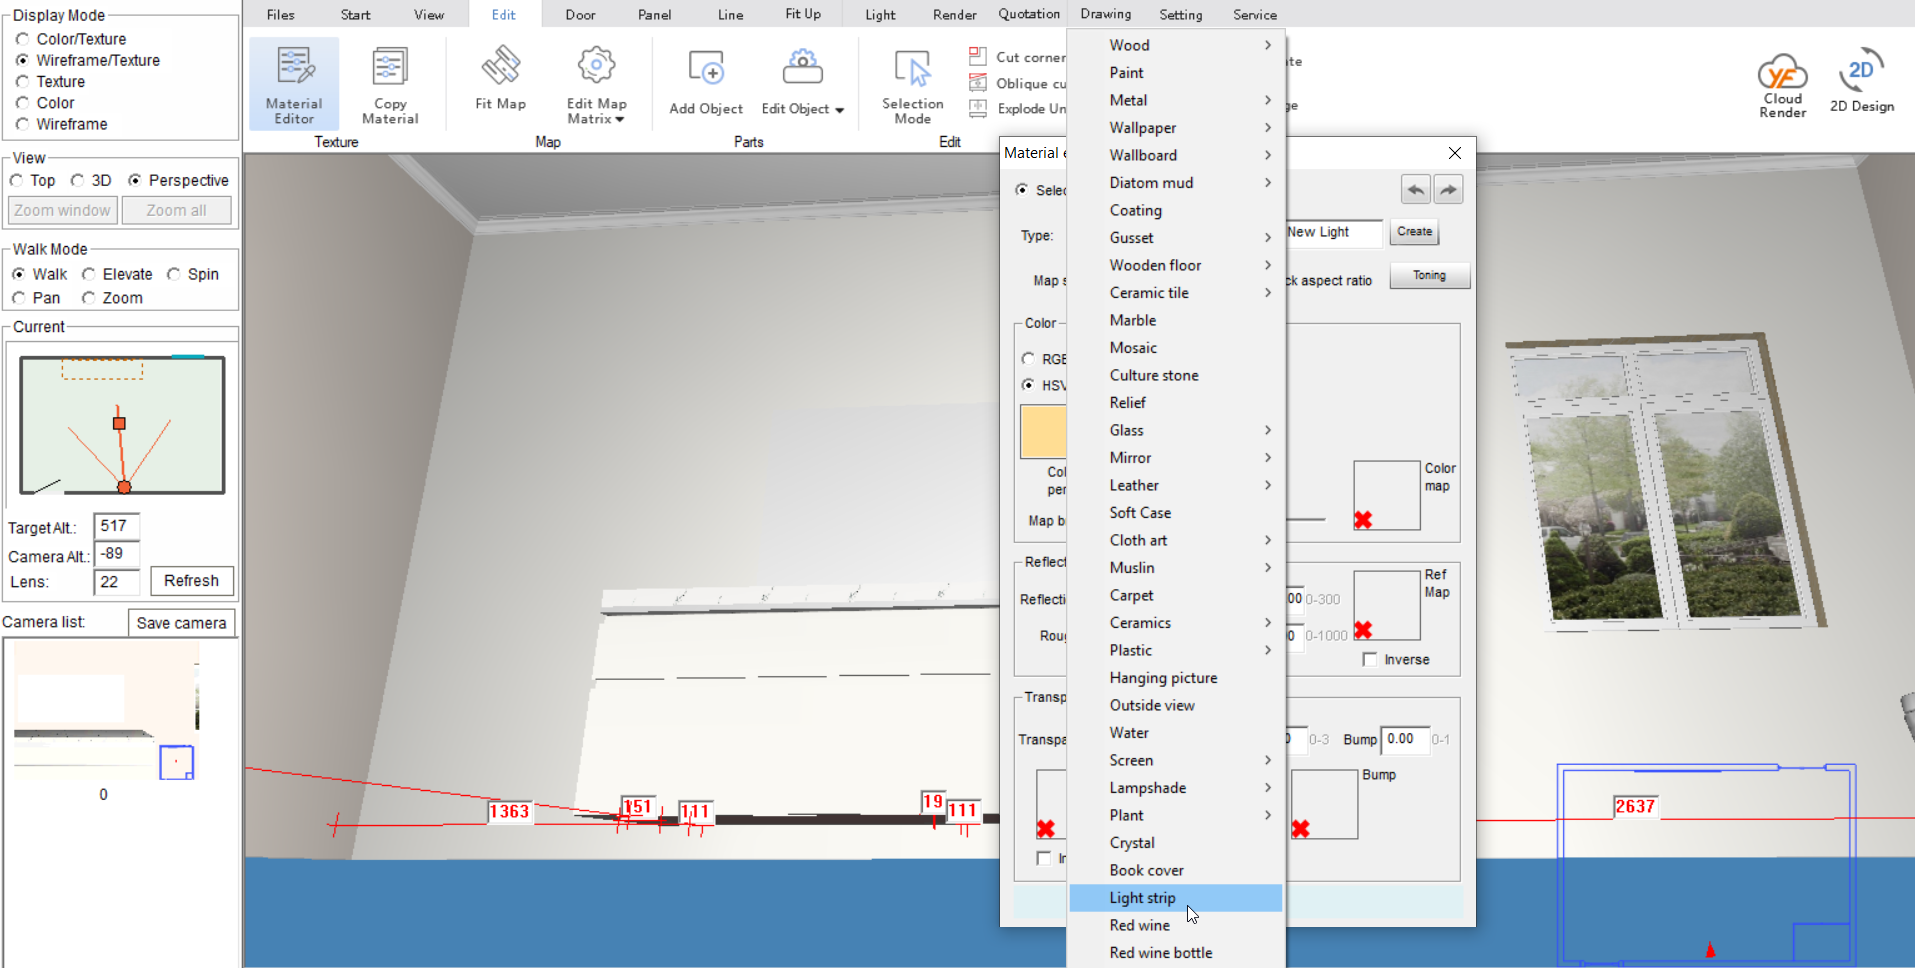
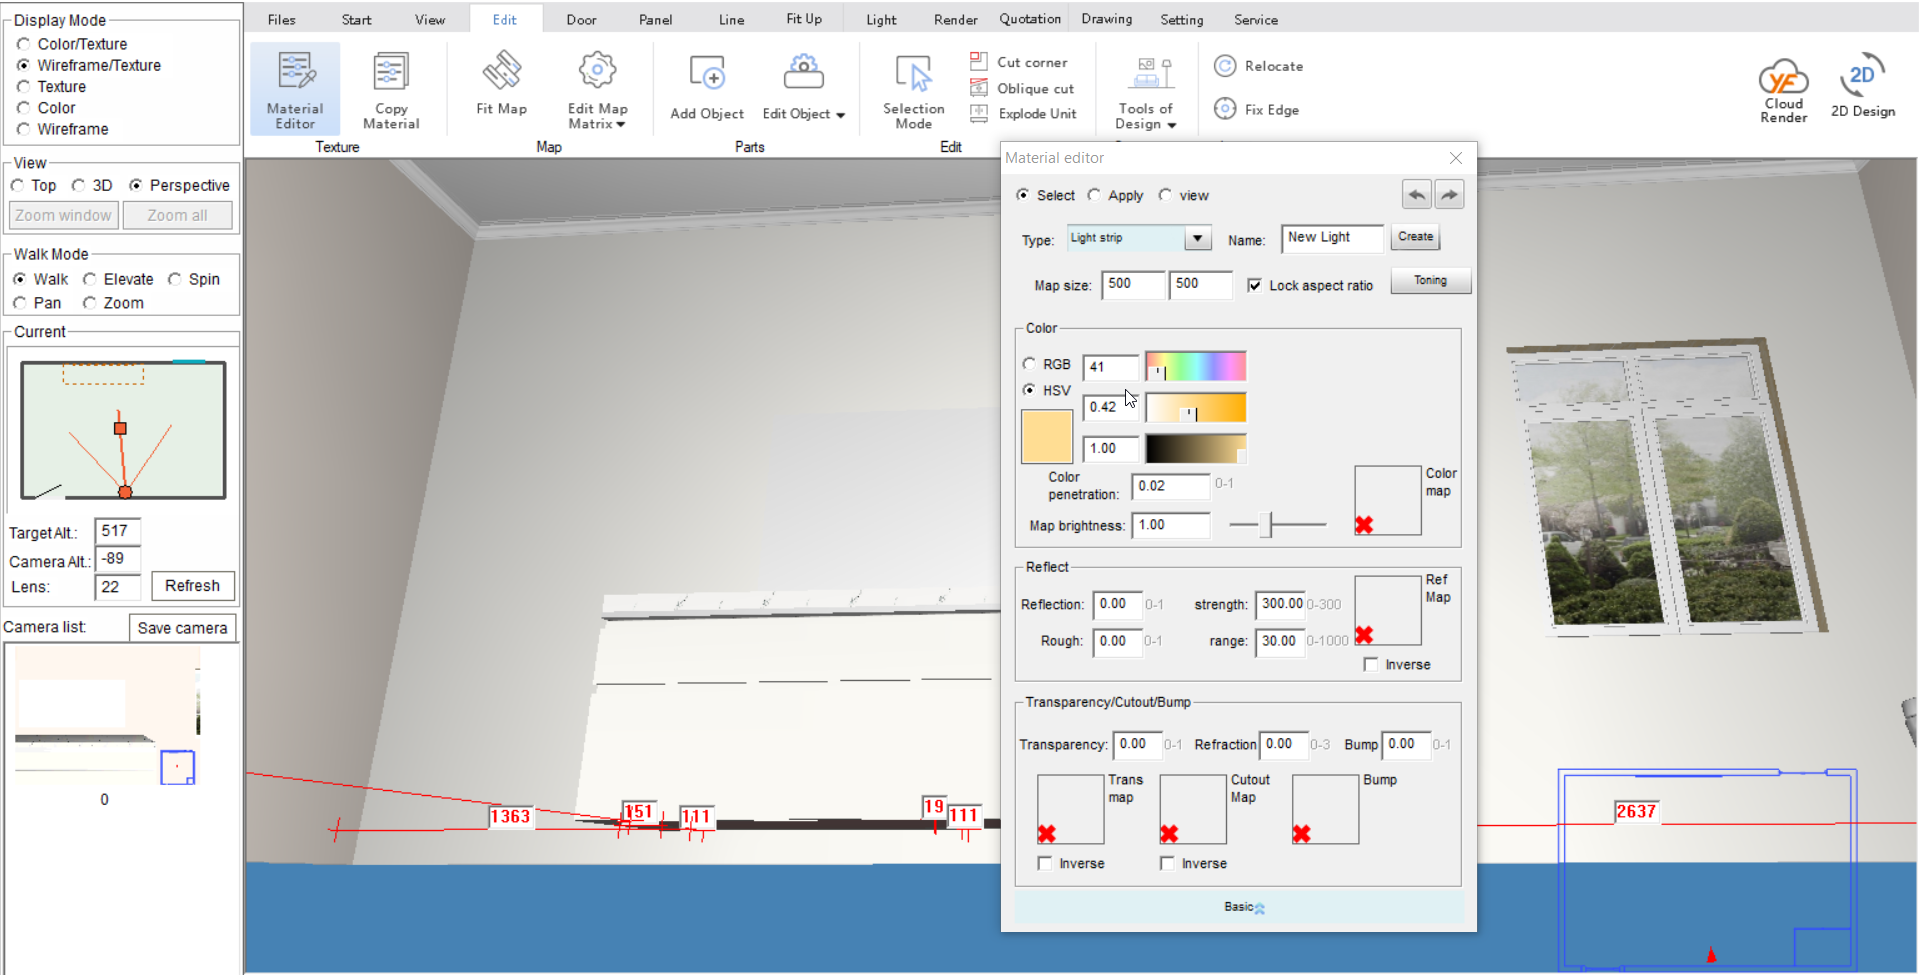
Now navigate to Edit> Material Editor and select the bottom of the decorative panel.
Now select Type >Light Strip.
Join in the conversation on our 3D Kitchen Design Australia – KD Max Facebook Group.
Do you have any handy tips that you use in KD Max? Send them through to info@cabinetsbycomputer.com and we will feature them on our website & Facebook page!


