Modify Doors & Drawers in KD Max
Looking to modify your door/drawer fronts in KD Max?
In this tutorial we will be covering the basics on how to modify cabinet door/drawer fronts.
1.
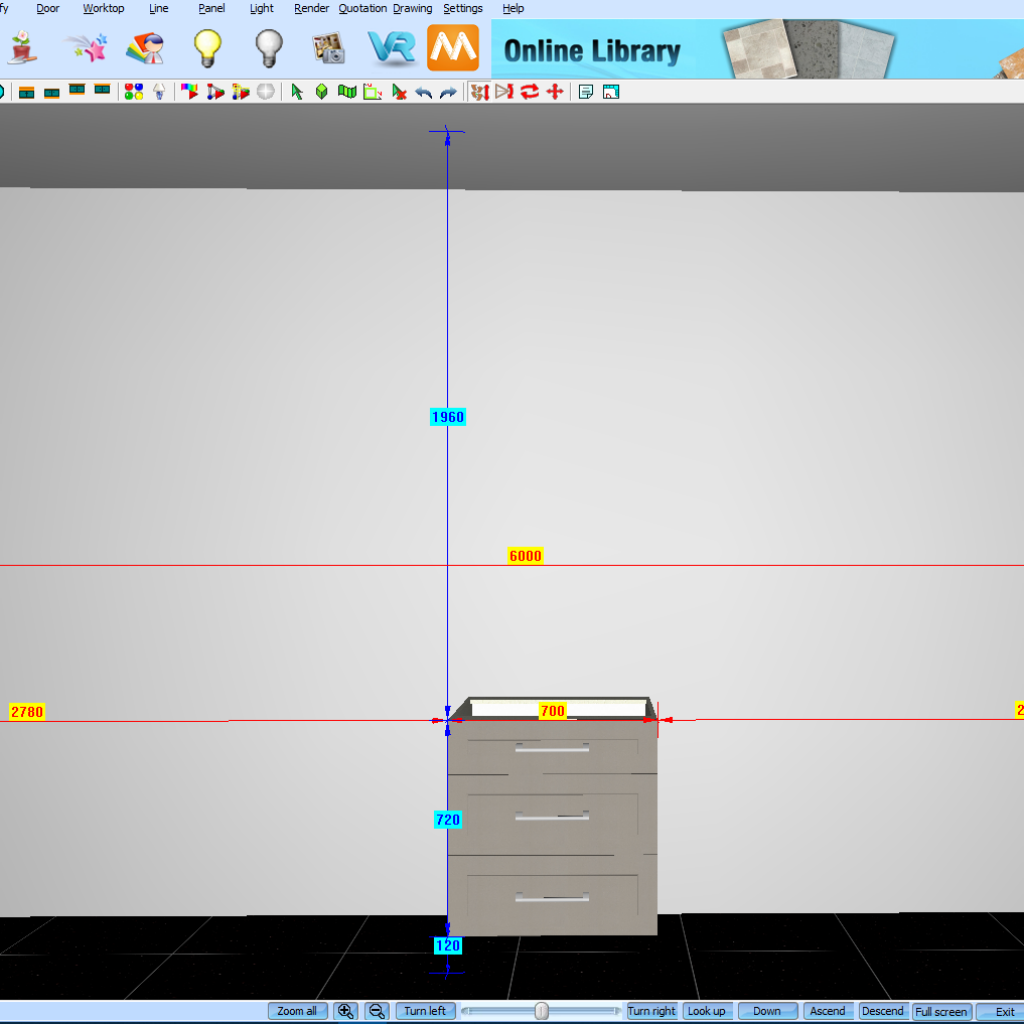
This process will demonstrate how to modify and replace a cabinet’s door in KD Max. In this example we will be replacing the doors on a standard base cabinet with a three drawer design with a top drawer of 180mm.
2.
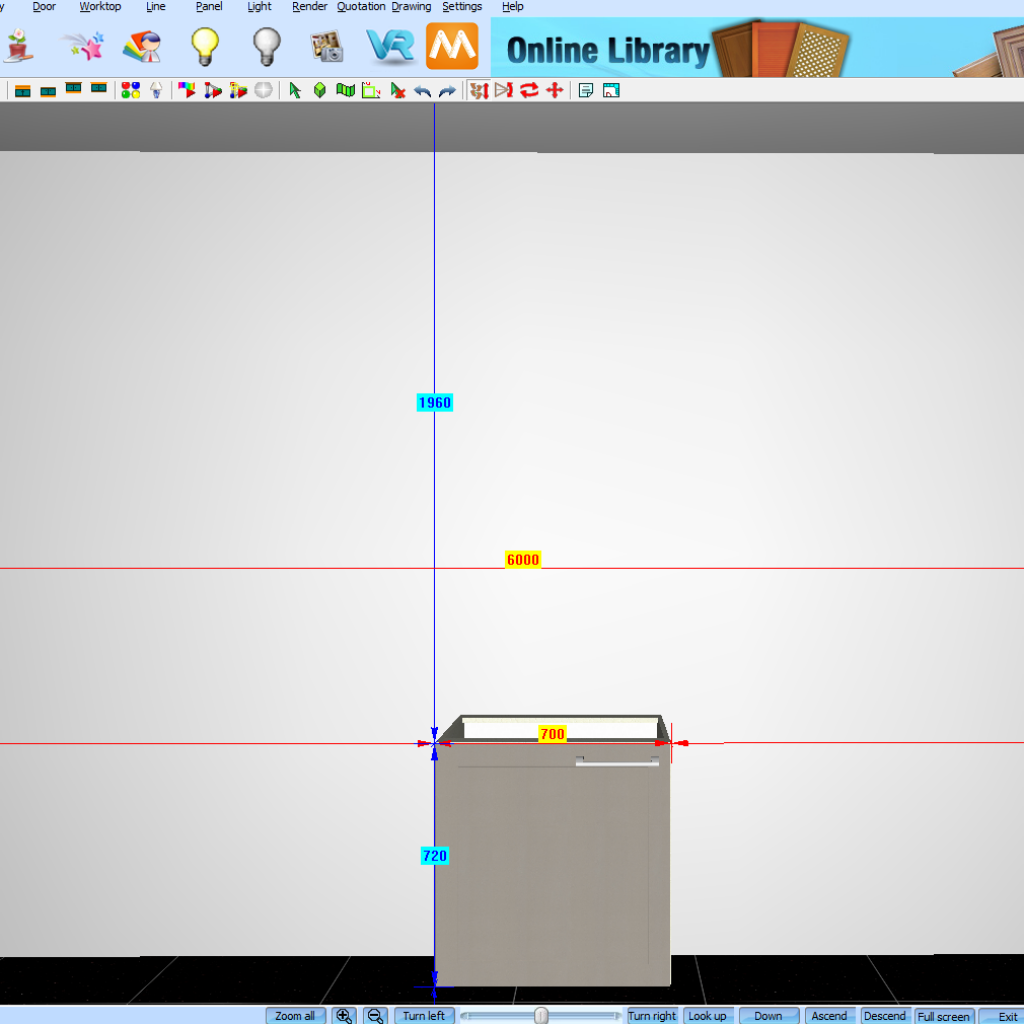
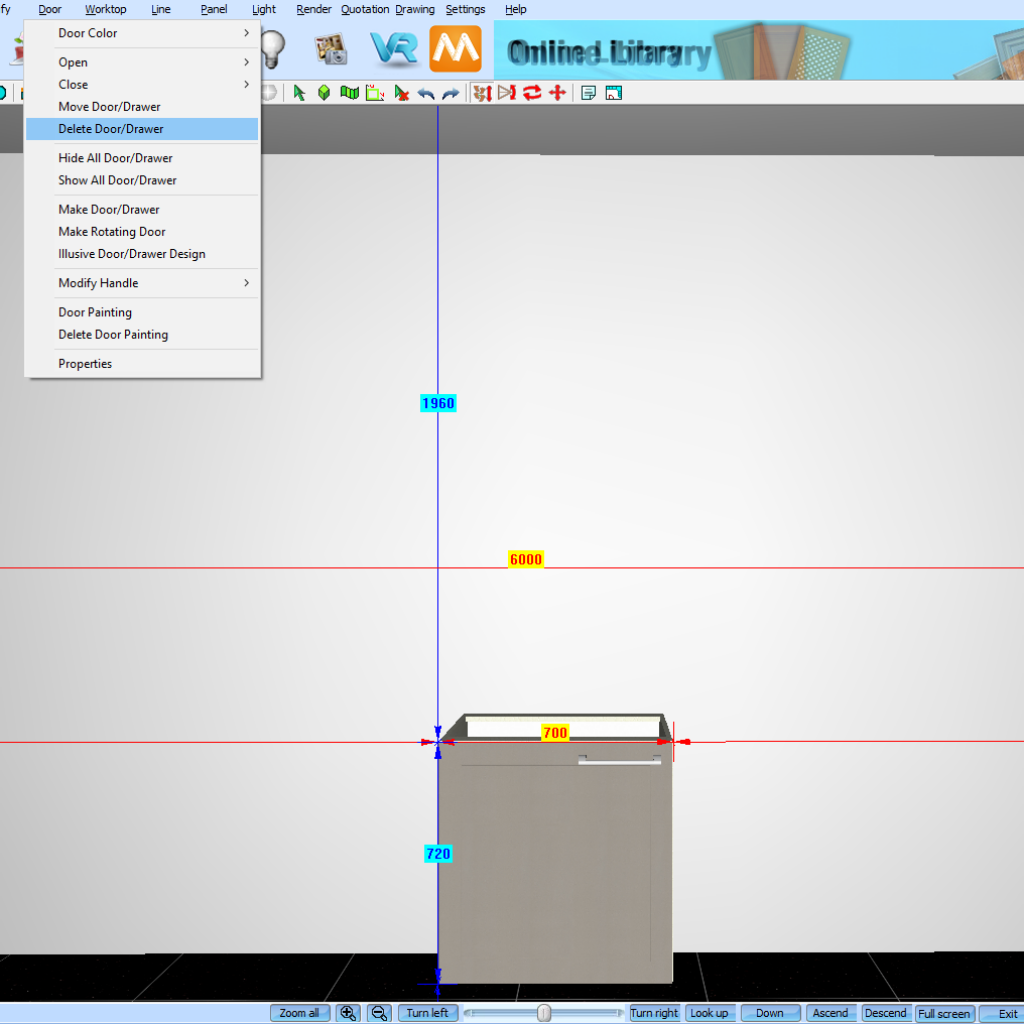
Firstly you’ll need to delete the existing door of the cabinet. This can be done using the fifth option under Door>Delete Door/Drawer as highlighted. Once you have clicked on Door>Delete Door/Drawer, select the door or drawer to delete and confirm by pressing the right mouse button.
3.
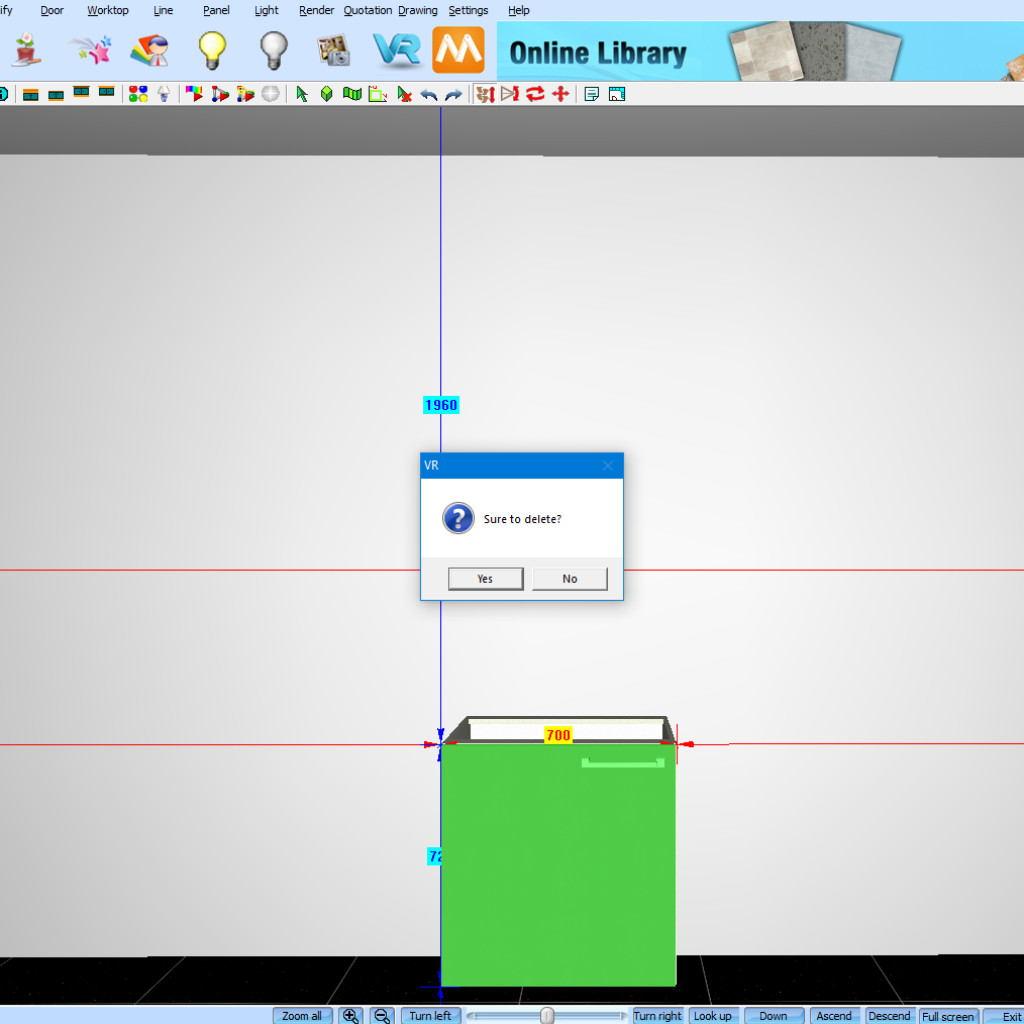
Once you have selected the doors or drawers to delete, you will be asked Sure to delete? Click YES to confirm.
4.
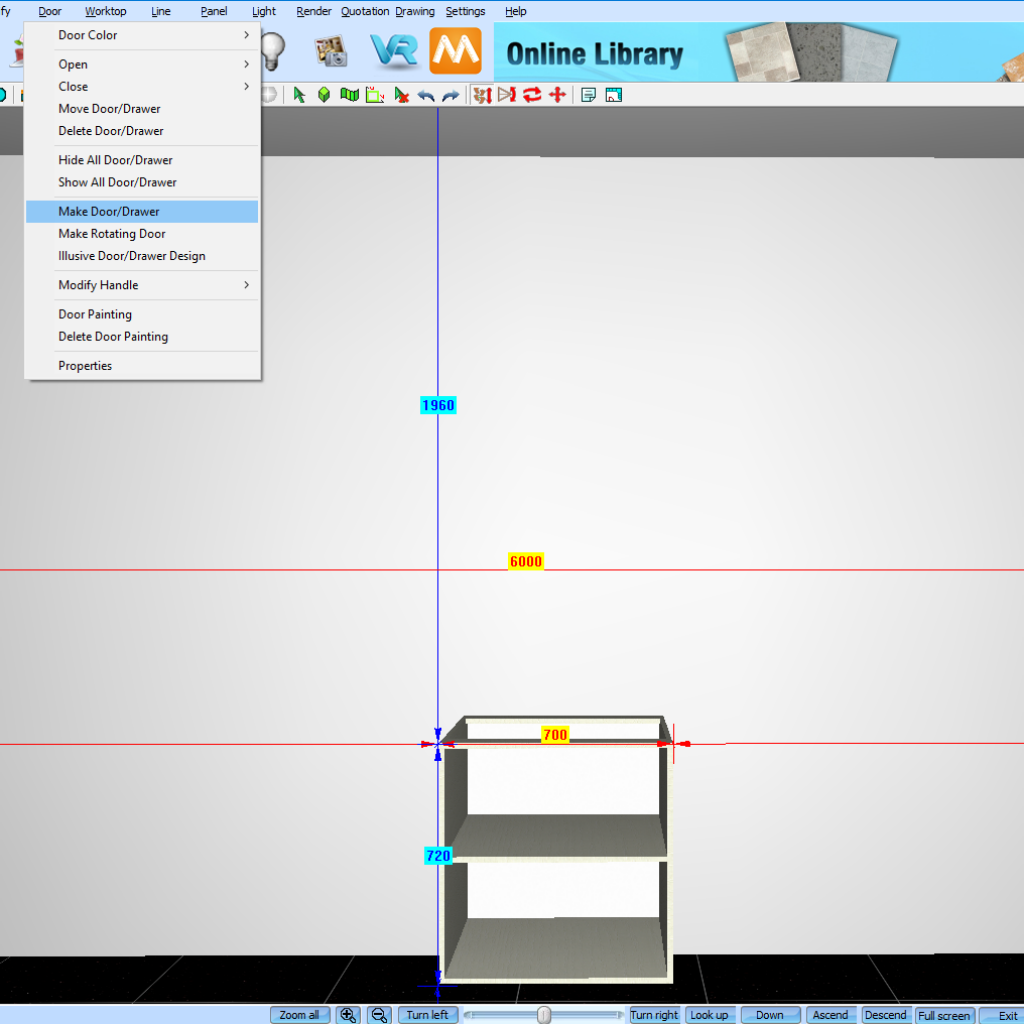
Next navigate to Door>Make Door/Drawer. Now select the top panel, bottom panel, left panel and right panel of the cabinet. Once you have selected all four sides of the cabinet a pop-up will appear titled Door and Drawer Design.
5.
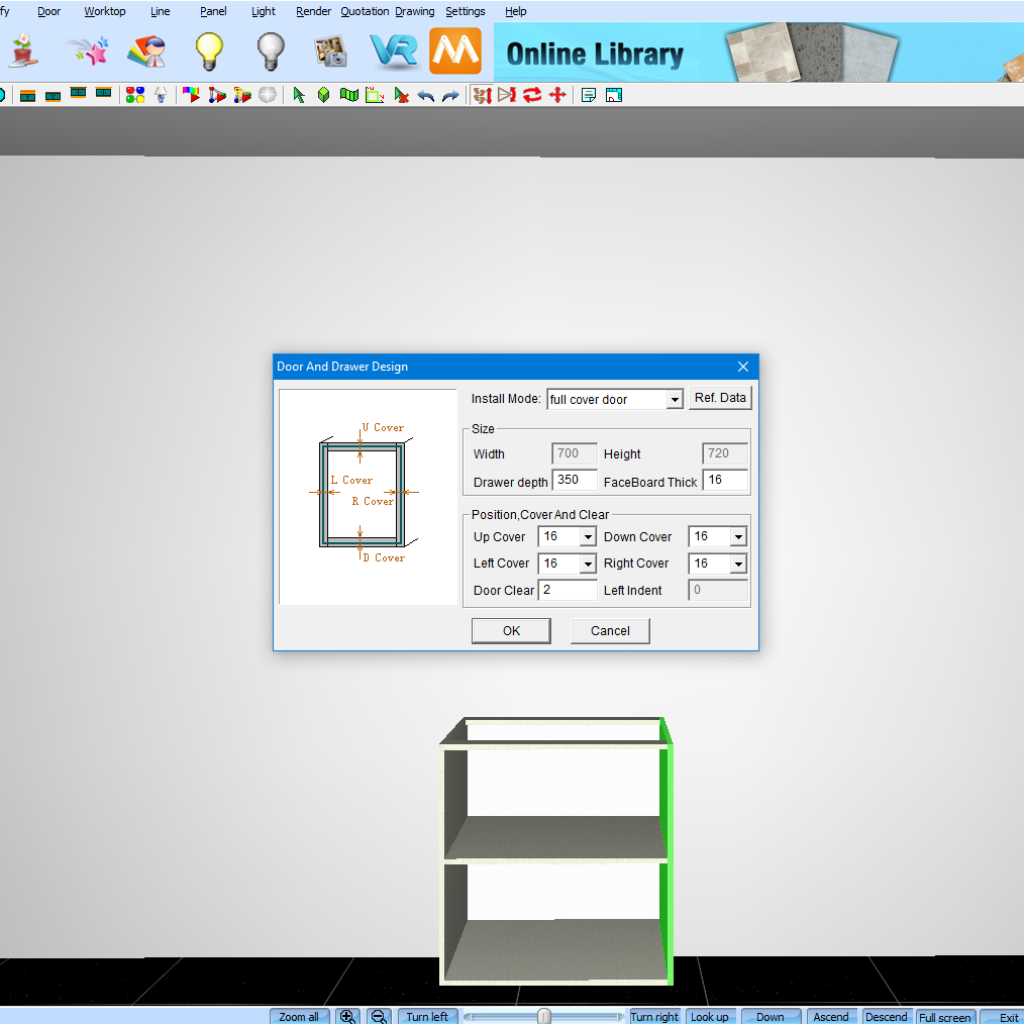
You will now need to populate the following text boxes as required. Install mode will determine if the door is a inset door, a semi-cover door or a full cover door. Position cover and clear refers to where the door will be positioned on the cabinet. In this example I have set the Install Mode to full cover door Position, Cover and Clear values to 16 as that is the thickness of the cabinets carcase and I’d like my door to be flush with the carcase. Once you are happy with your selection, hit OK.
6.
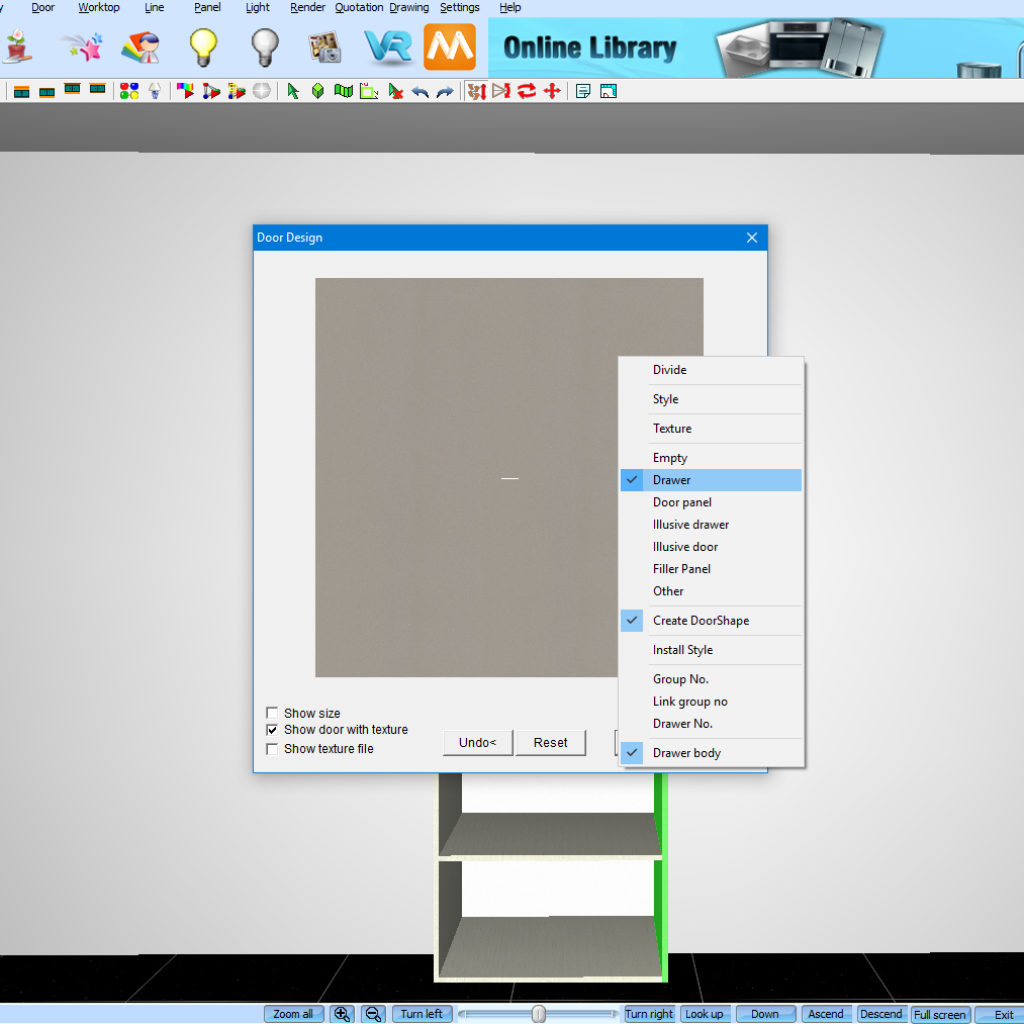
Firstly right click on the image in the door design pop-up to set what kind of door you’d like your cabinet to have out of drawer, door, illusive panel ETC. Now right click the image and select divide. This will allow you to divide your cabinet door and specify drawer heights if applicable.
7.
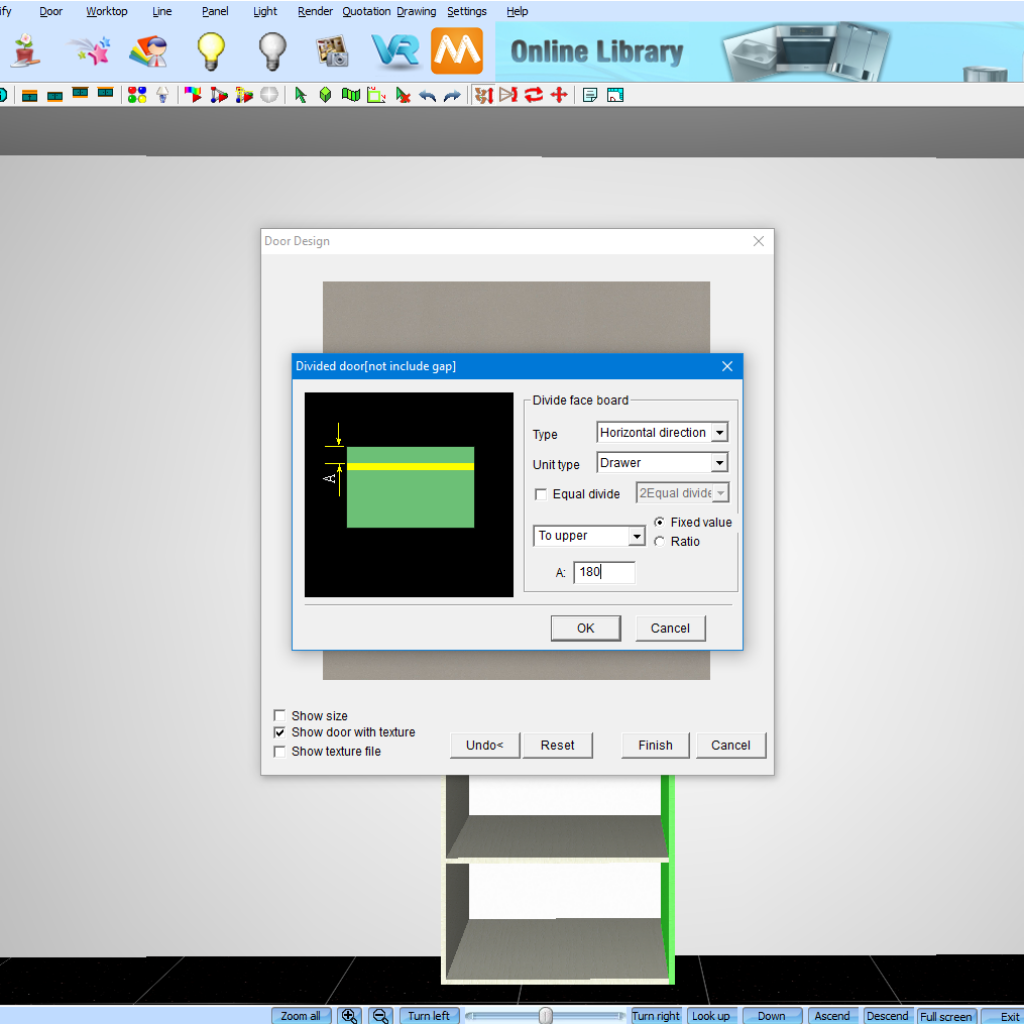
Now select how you’d like to divide the door. Either horizontally or vertically. To specify a single drawer height, set the A: box to your desired height. I have set mine to 180.
8.
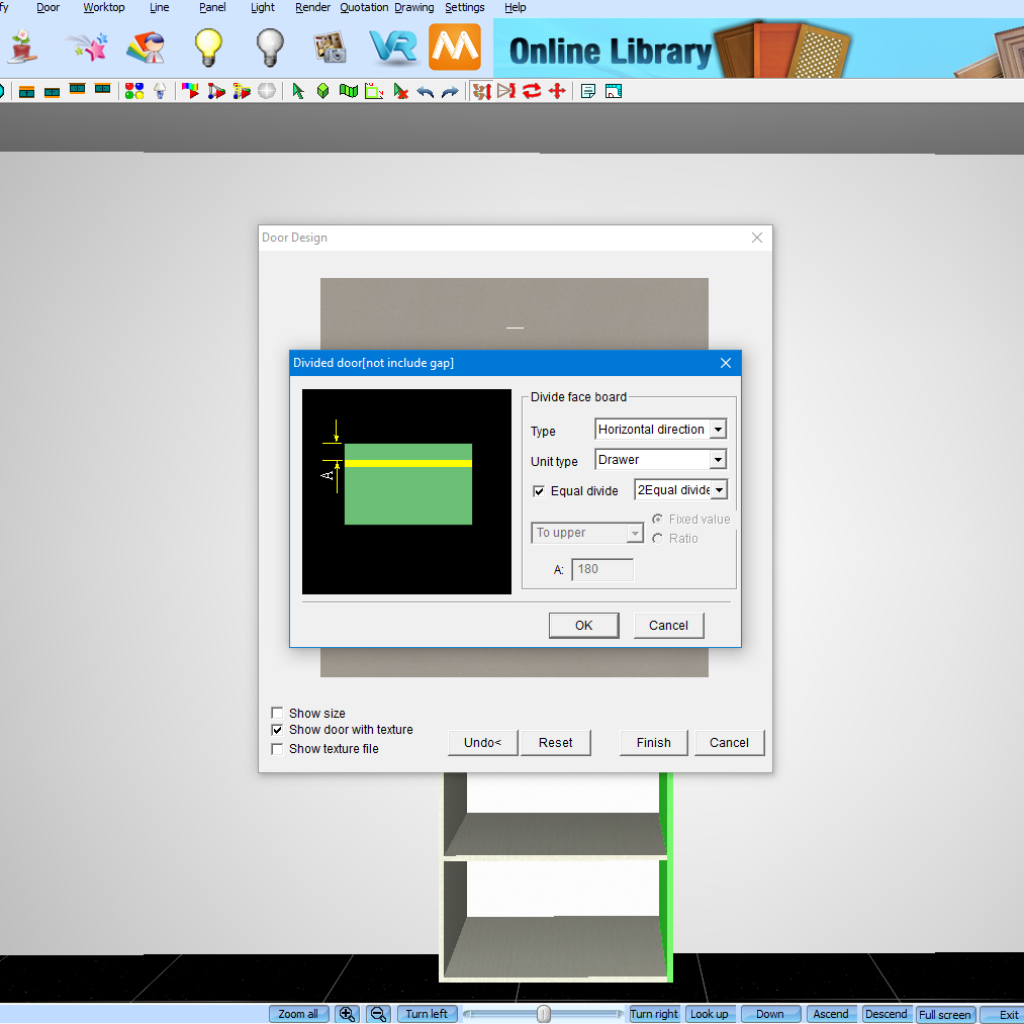
Once you have hit OK you will notice your door has now been divided into two sections. As we are creating a three drawer design in this example, we will be right clicking on the bottom section of the texture and dividing this into a third drawer. Once again hit the Divide button. Now select Equal Divide to equally divide the bottom section. You can specify the amount of divides by clicking the drop down.
9.
Once you are happy with the door options, hit the OK button once again, then Finish to apply this to the cabinet.
10.
Done! You have now replaced the doors of a cabinet.
You can now change the colour or handles for extra customisation.
Join in the conversation on our 3D Kitchen Design Australia – KD Max Facebook Group.
Keen to show of some of the awesome designs you have made in KD Max? Send them through to info@cabinetsbycomputer.com and we will feature it on our website & Facebook page!


