How to use the Alignment Function in KD Max
The Align function is used to move an object (Source) to a second object (Target).
This can be done with regards to each of the 6 sides and centers of the objects. (Top, Bottom, Front, Back, Left Side, Right Side)
To get the most out of the align function, the Source and Target objects need to be in the same or reverse (180) orientation (back to front). This ensures that when selecting the sides to align they are on the same axis.
Below are two common scenarios showing how the align function can be extremely helpful when designing in KD Max.
Scenario 1:
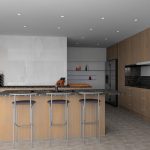
Aligning a panel across the back of an Island Bench
1.
Firstly, create a panel in the correct orientation.
2.
Make the depth the thickness of the board.
Make the width the same width of the island bench.
3.
Layout the panel into the room making sure the panel is in the correct orientation (remember the red arrow points to the front of the unit).
4.
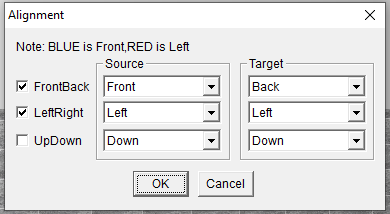
Using the Alignment function, the panel can be placed at the back of the island bench. In this case the panel is being moved to the island bench so the Panel will be the Source and the end panel will be the Target.
By choosing the Left sides on both the source and target, both Left sides are brought in line together.
By choosing the Front of the source to the Back of the target, the Front of the panel is brought to the Back of the unit within the island bench.
Scenario 2:
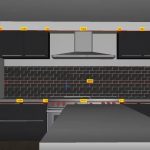
Simulating a pullout rangehood.
1.
Firstly, create a panel in the correct orientation.
2.
Layout the panel into the room making sure the panel is in the correct orientation (remember the red arrow points to the front of the unit).
3.
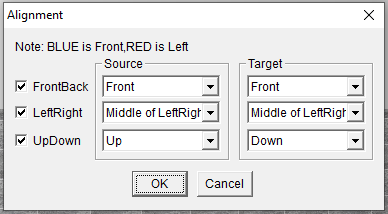
Using the Alignment function, the panel can be placed into the correct position under the wall unit.
In this case the Panel is the Source and the Wall unit is the target.
Both Front sides will be flush, the panel will be in the center (Middle of LeftRight) of the unit above and the Up side of the source will touch the Down side of the target.
4.
Once the panel is in place then Change the colour properties of the unit with Material edit.
Join in the conversation on our 3D Kitchen Design Australia – KD Max Facebook Group.
Proud of a design that you have made in KD Max? Send it through to info@cabinetsbycomputer.com and we will feature it on our website & Facebook page!


