
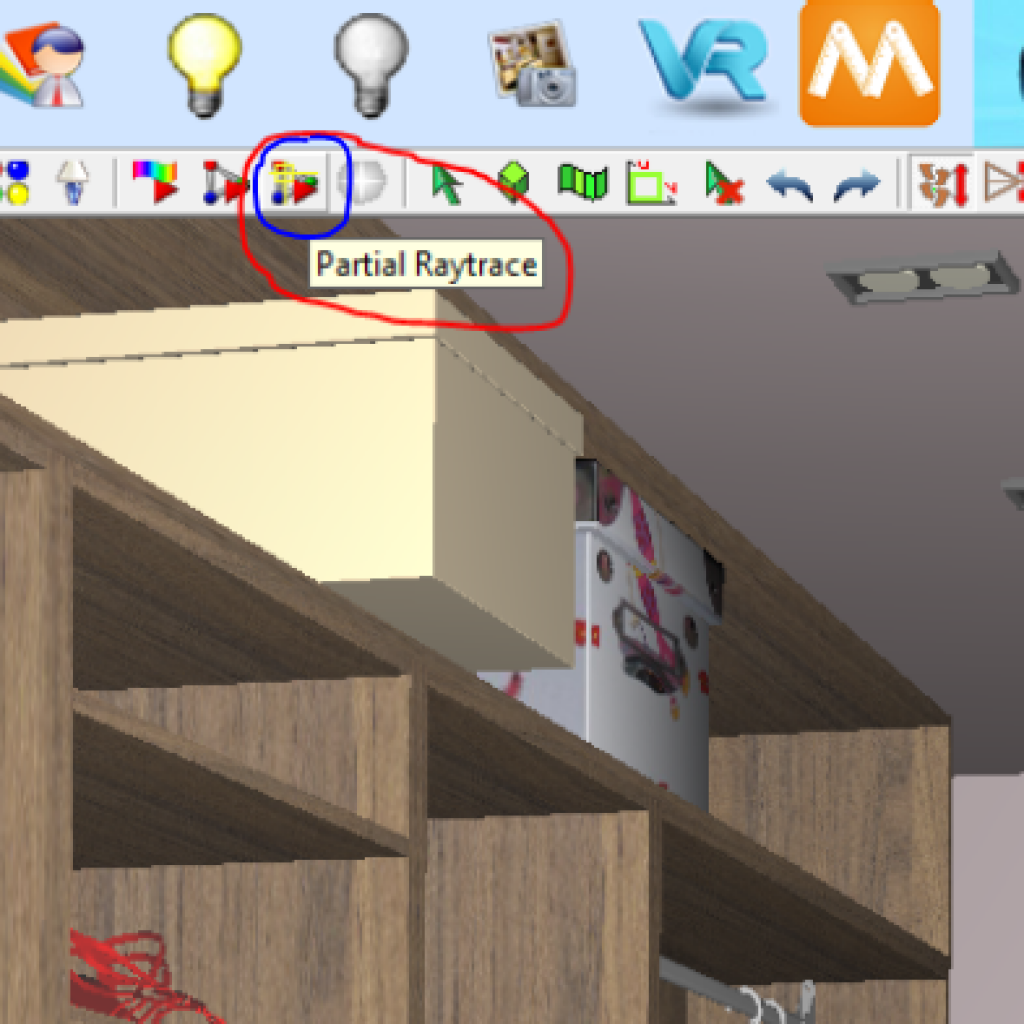
Partial Raytrace
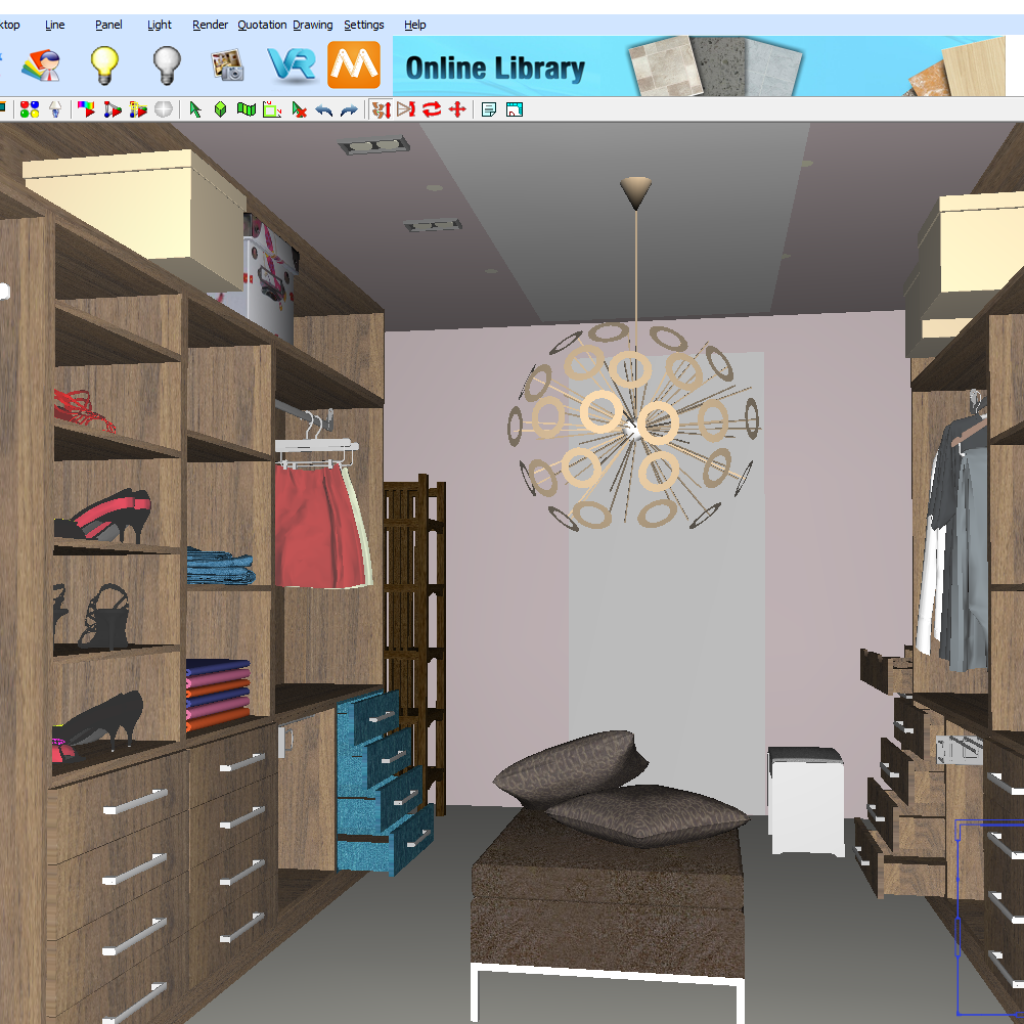
Have you ever wondered how 2 different elements might look in a rendered image in your final design,
but haven’t wanted to go through 2 complete renders of your drawing with each option to see the result and compare?
Then the Partial Raytrace function might just be the perfect solution that you didn’t know about.

1.
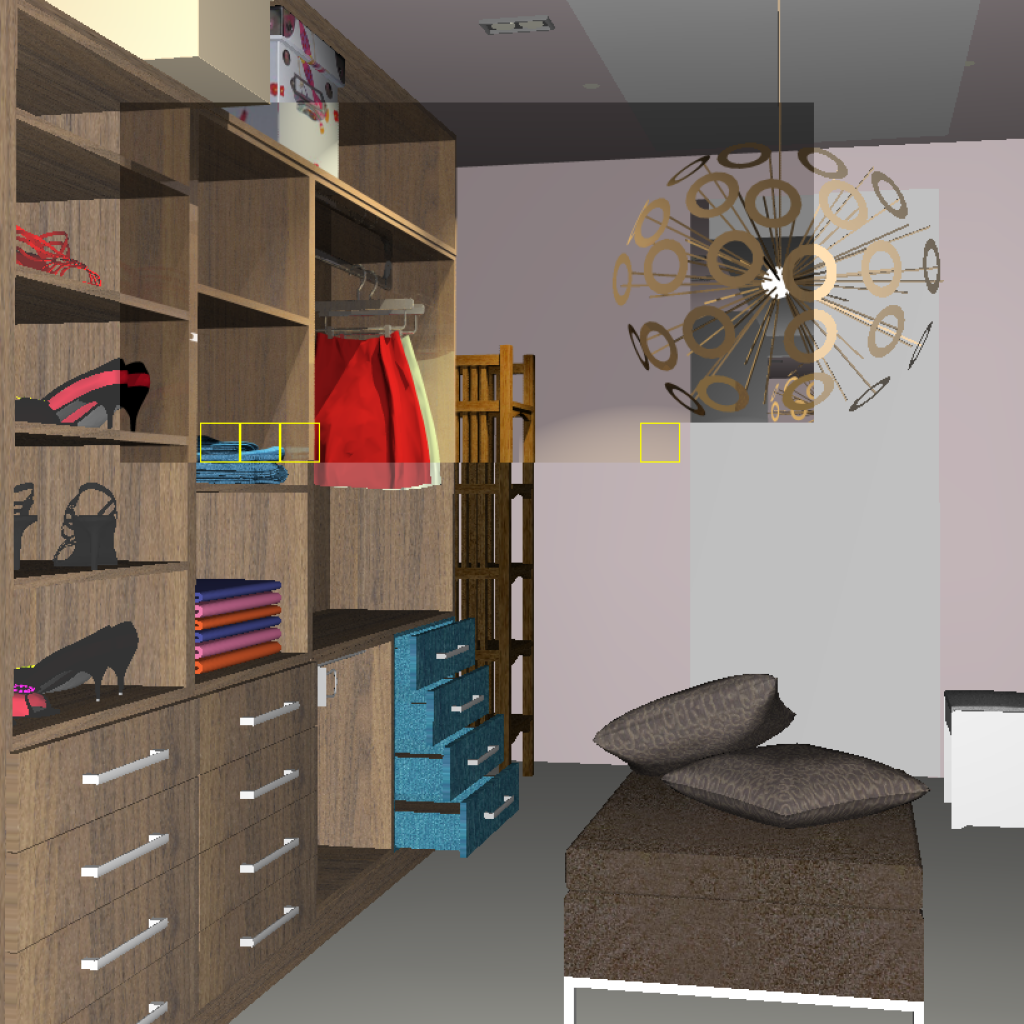
In this example, the colour of one of the drawer banks was changed, with the designer wanting to see the differences between the two colours once rendered.
2.
Select the Partial Raytrace button – this lives on your toolbar just underneath where the lights on/lights off buttons are.
3.
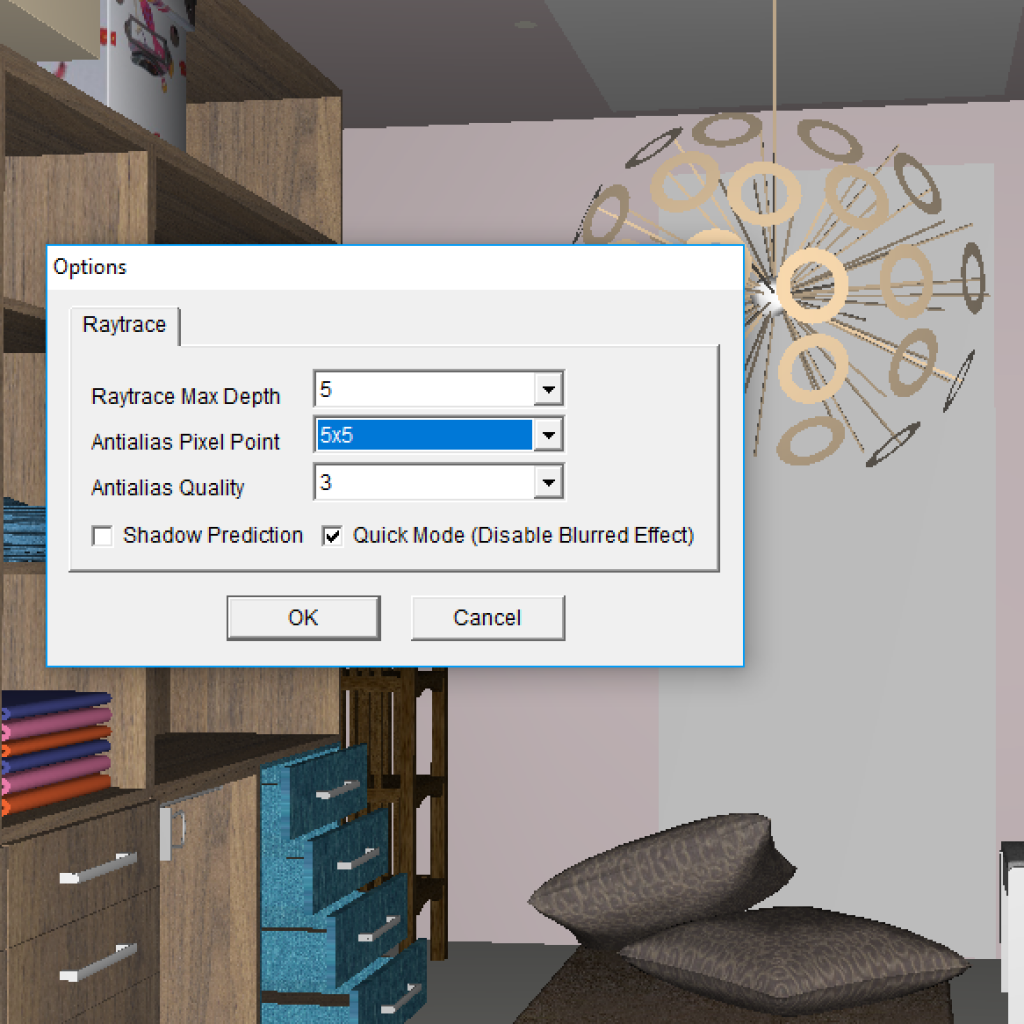
Set your Raytrace Max Depth, Antialias Pixel Point and Quality (these settings determine the smoothness of your drawing, making it more realistic rather than having sharp jagged edges). Click OK when ready.
4.
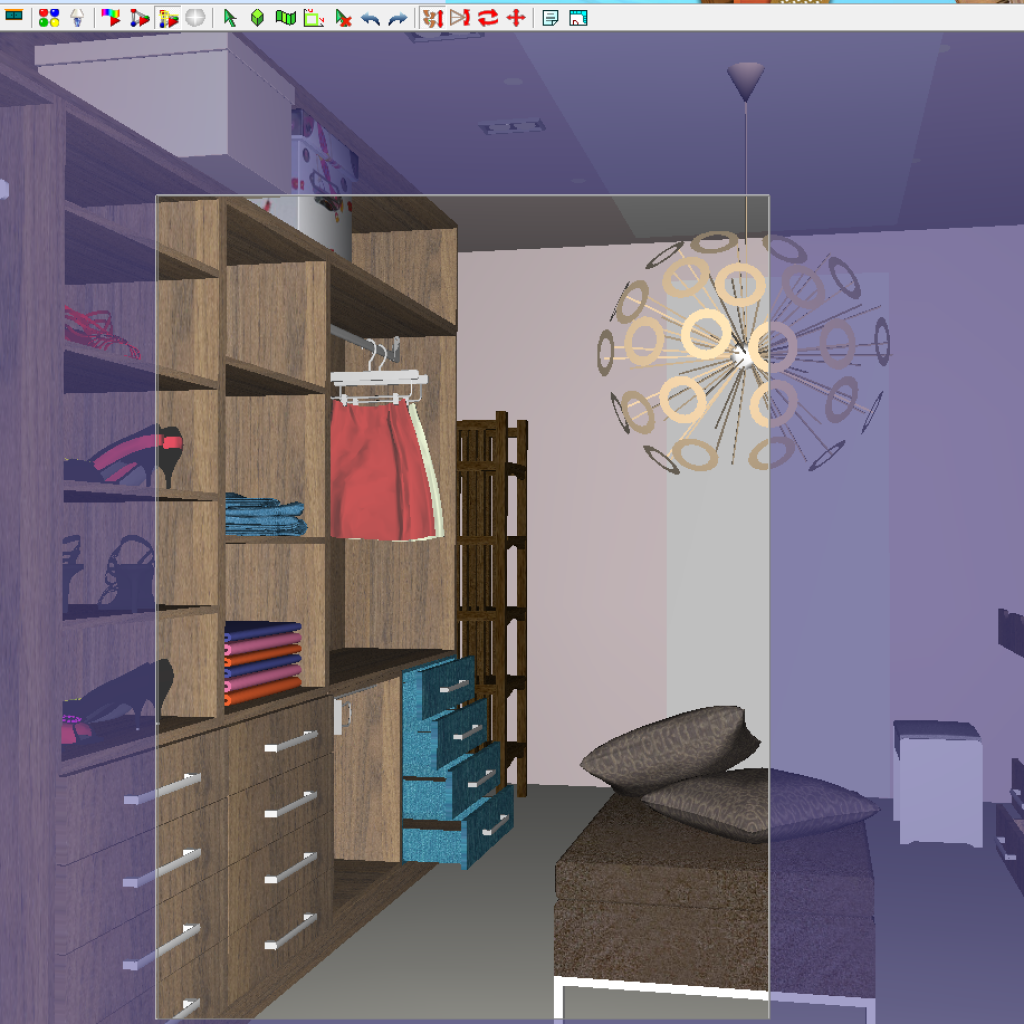
Click and drag a box around the section that you were wanting to do a partial render on.
5.
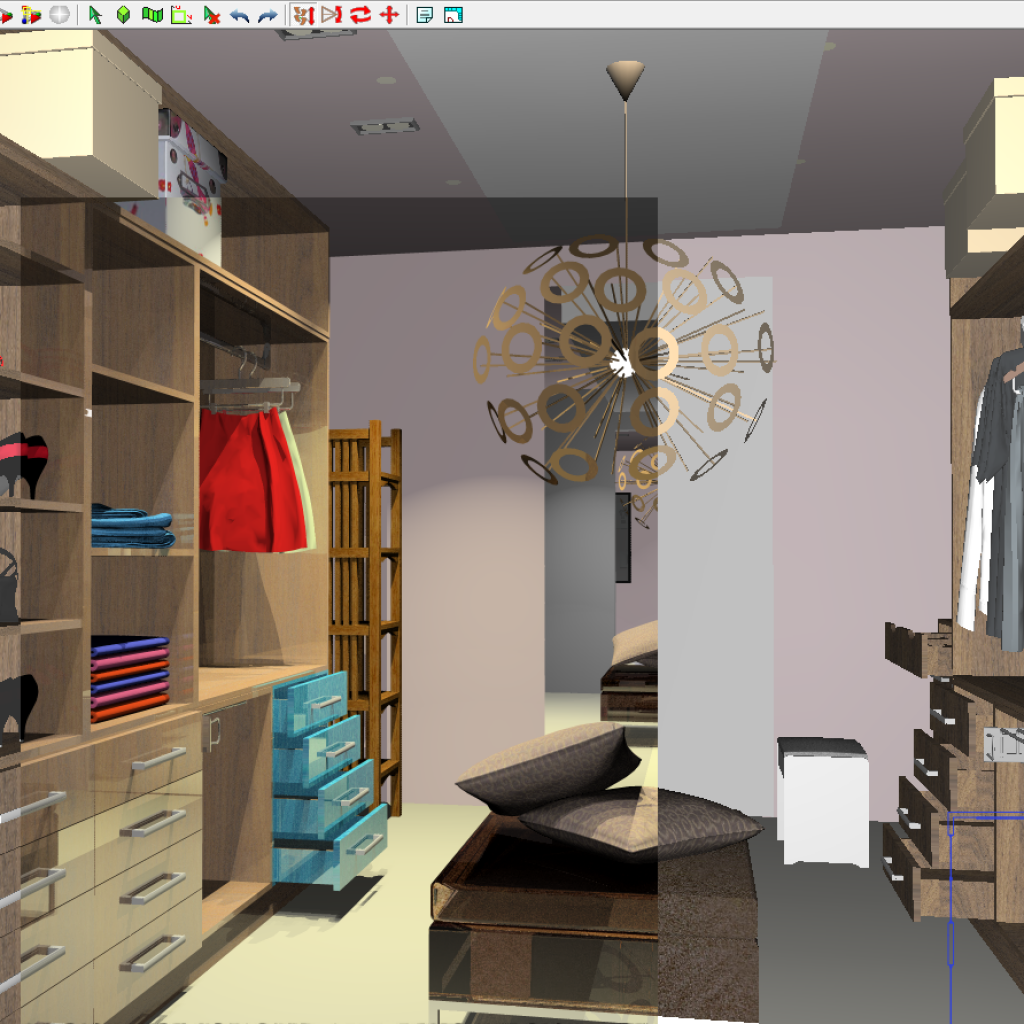
Click again to finalise your selection, and the Partial Raytrace will begin.
6.
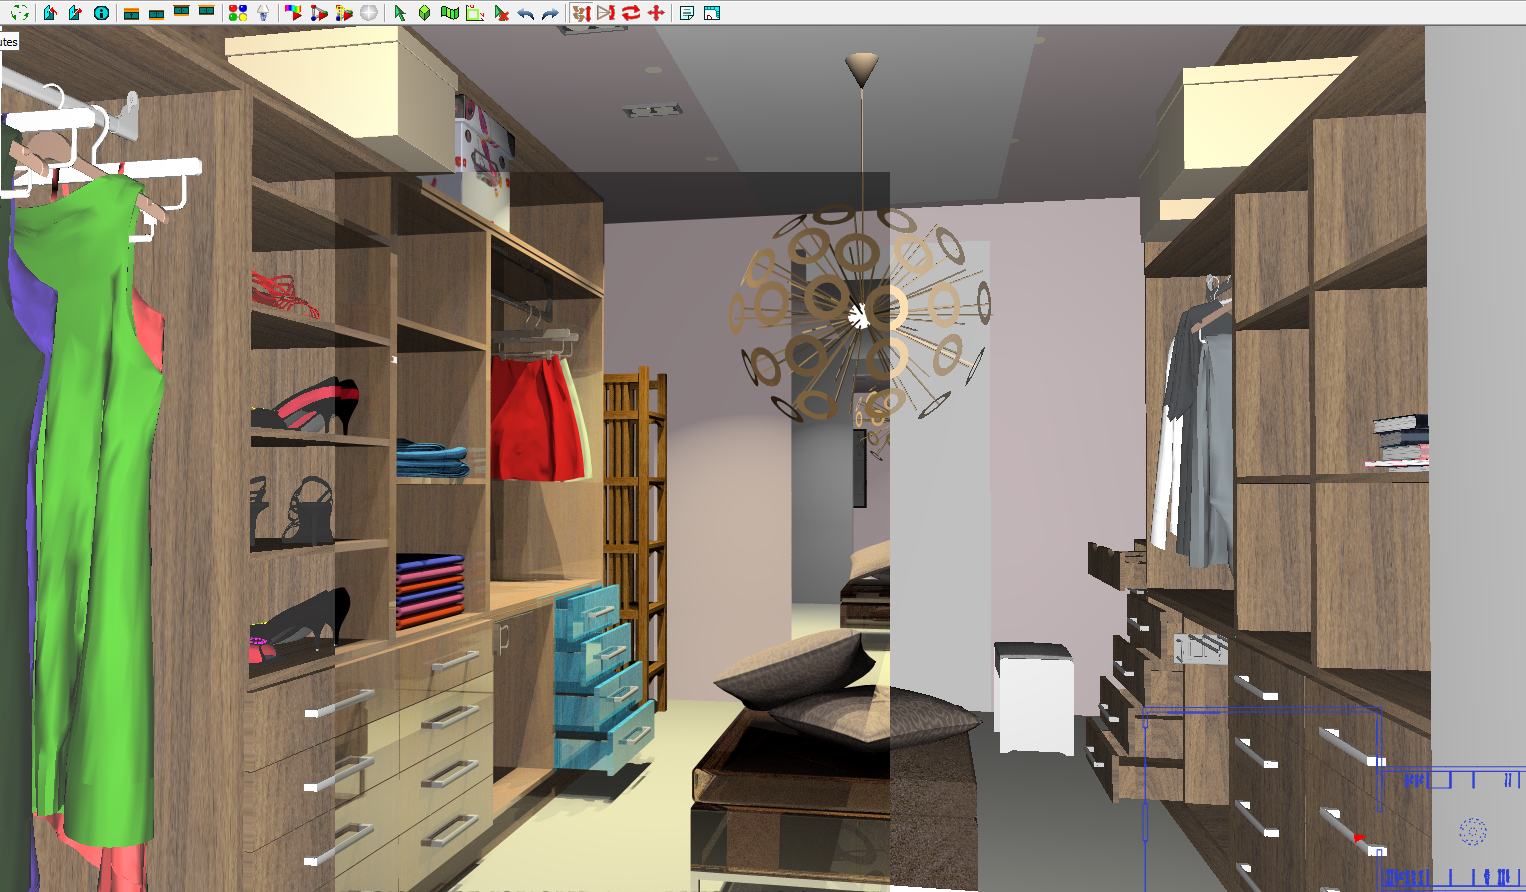
Voila! Easy quick rendered sections of your drawing are now just a few clicks away.
Join in the conversation on our 3D Kitchen Design Australia – KD Max Facebook Group.
Do you have any handy tips that you use in KD Max? Send them through to info@cabinetsbycomputer.com and we will feature them on our website & Facebook page!

